
Introduction 🚀
In this project, I focused on implementing and deploying diffusion
models for image generation.
Part A: Explored diffusion models with sampling
loops and applying them to tasks such as inpainting and generating
optical illusions.
Part B: Developed and trained my own UNet-based
diffusion models, including unconditional, time-conditioned, and
class-conditioned variants, using the MNIST dataset.
Part A 🌸
0. Setup and Sampling from the Model
Throughout this part and the subsequent parts, the random seed that I used is 0. Additionally we are using the DeepFloyd IF diffusion model which is a two stage model trained by stability AI. The first stage produces images of size 64x64 and the second takes the output of the first to generate a larger image of 256x256.
Here are the stage 1 outputs for
num_inference_steps=20.

An oil painting of a scene

A man wearing a hat

A rocket ship
and for num_inference_steps=100.

An oil painting of a scene

A man wearing a hat

A rocket ship
Here are the stage 2 outputs:
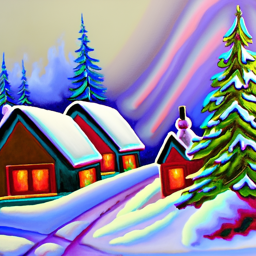
An oil painting of a scene
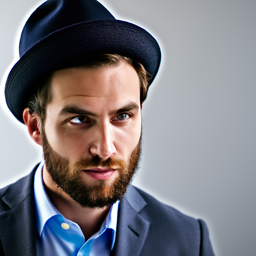
A man wearing a hat

A rocket ship
and for num_inference_steps=100.
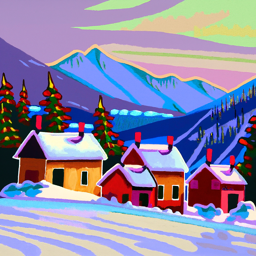
An oil painting of a scene

A man wearing a hat

A rocket ship
At num_inference_steps=20, the images are less
realistic. The rocket ship has the best results showing a standard
rocket ship in the sky. While the other two results also correspond
with the image, the oil painting strokes aren't very prevelant and
look the same style as a non oil painting image and the man wearing
a hat has its eyes looking at each other which makes the image look
a little less realistic.
At num_inference_steps=100, the quality of the images
improve and correspond closer with the text. The oil painting
strokes are more realistic and the previous issue with unrealistic
eyes in the man wearing the hat is resolved.
1.1. Implementing the Forward Process
I obtained epsilon using
torch.randn_like and indexed into
alpha_cumprod for timestep t. to implement the forward
function defined with the following equation:

This obtained the following outputs for different denoising levels

Original Image

Timestep 250

Timestep 500

Timestep 750
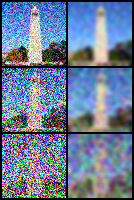
1.2. Classical Denoising
I applied Gaussian blur filtering with
kernel_size=7 and sigma=7 using
torchvision.transforms.functional.gaussian_blur
as an attempt to denoise the images. Here are the noisy images and
their Gaussian-denoised verison shown together for comparison for
the respective timesteps of 250, 500 and
750.
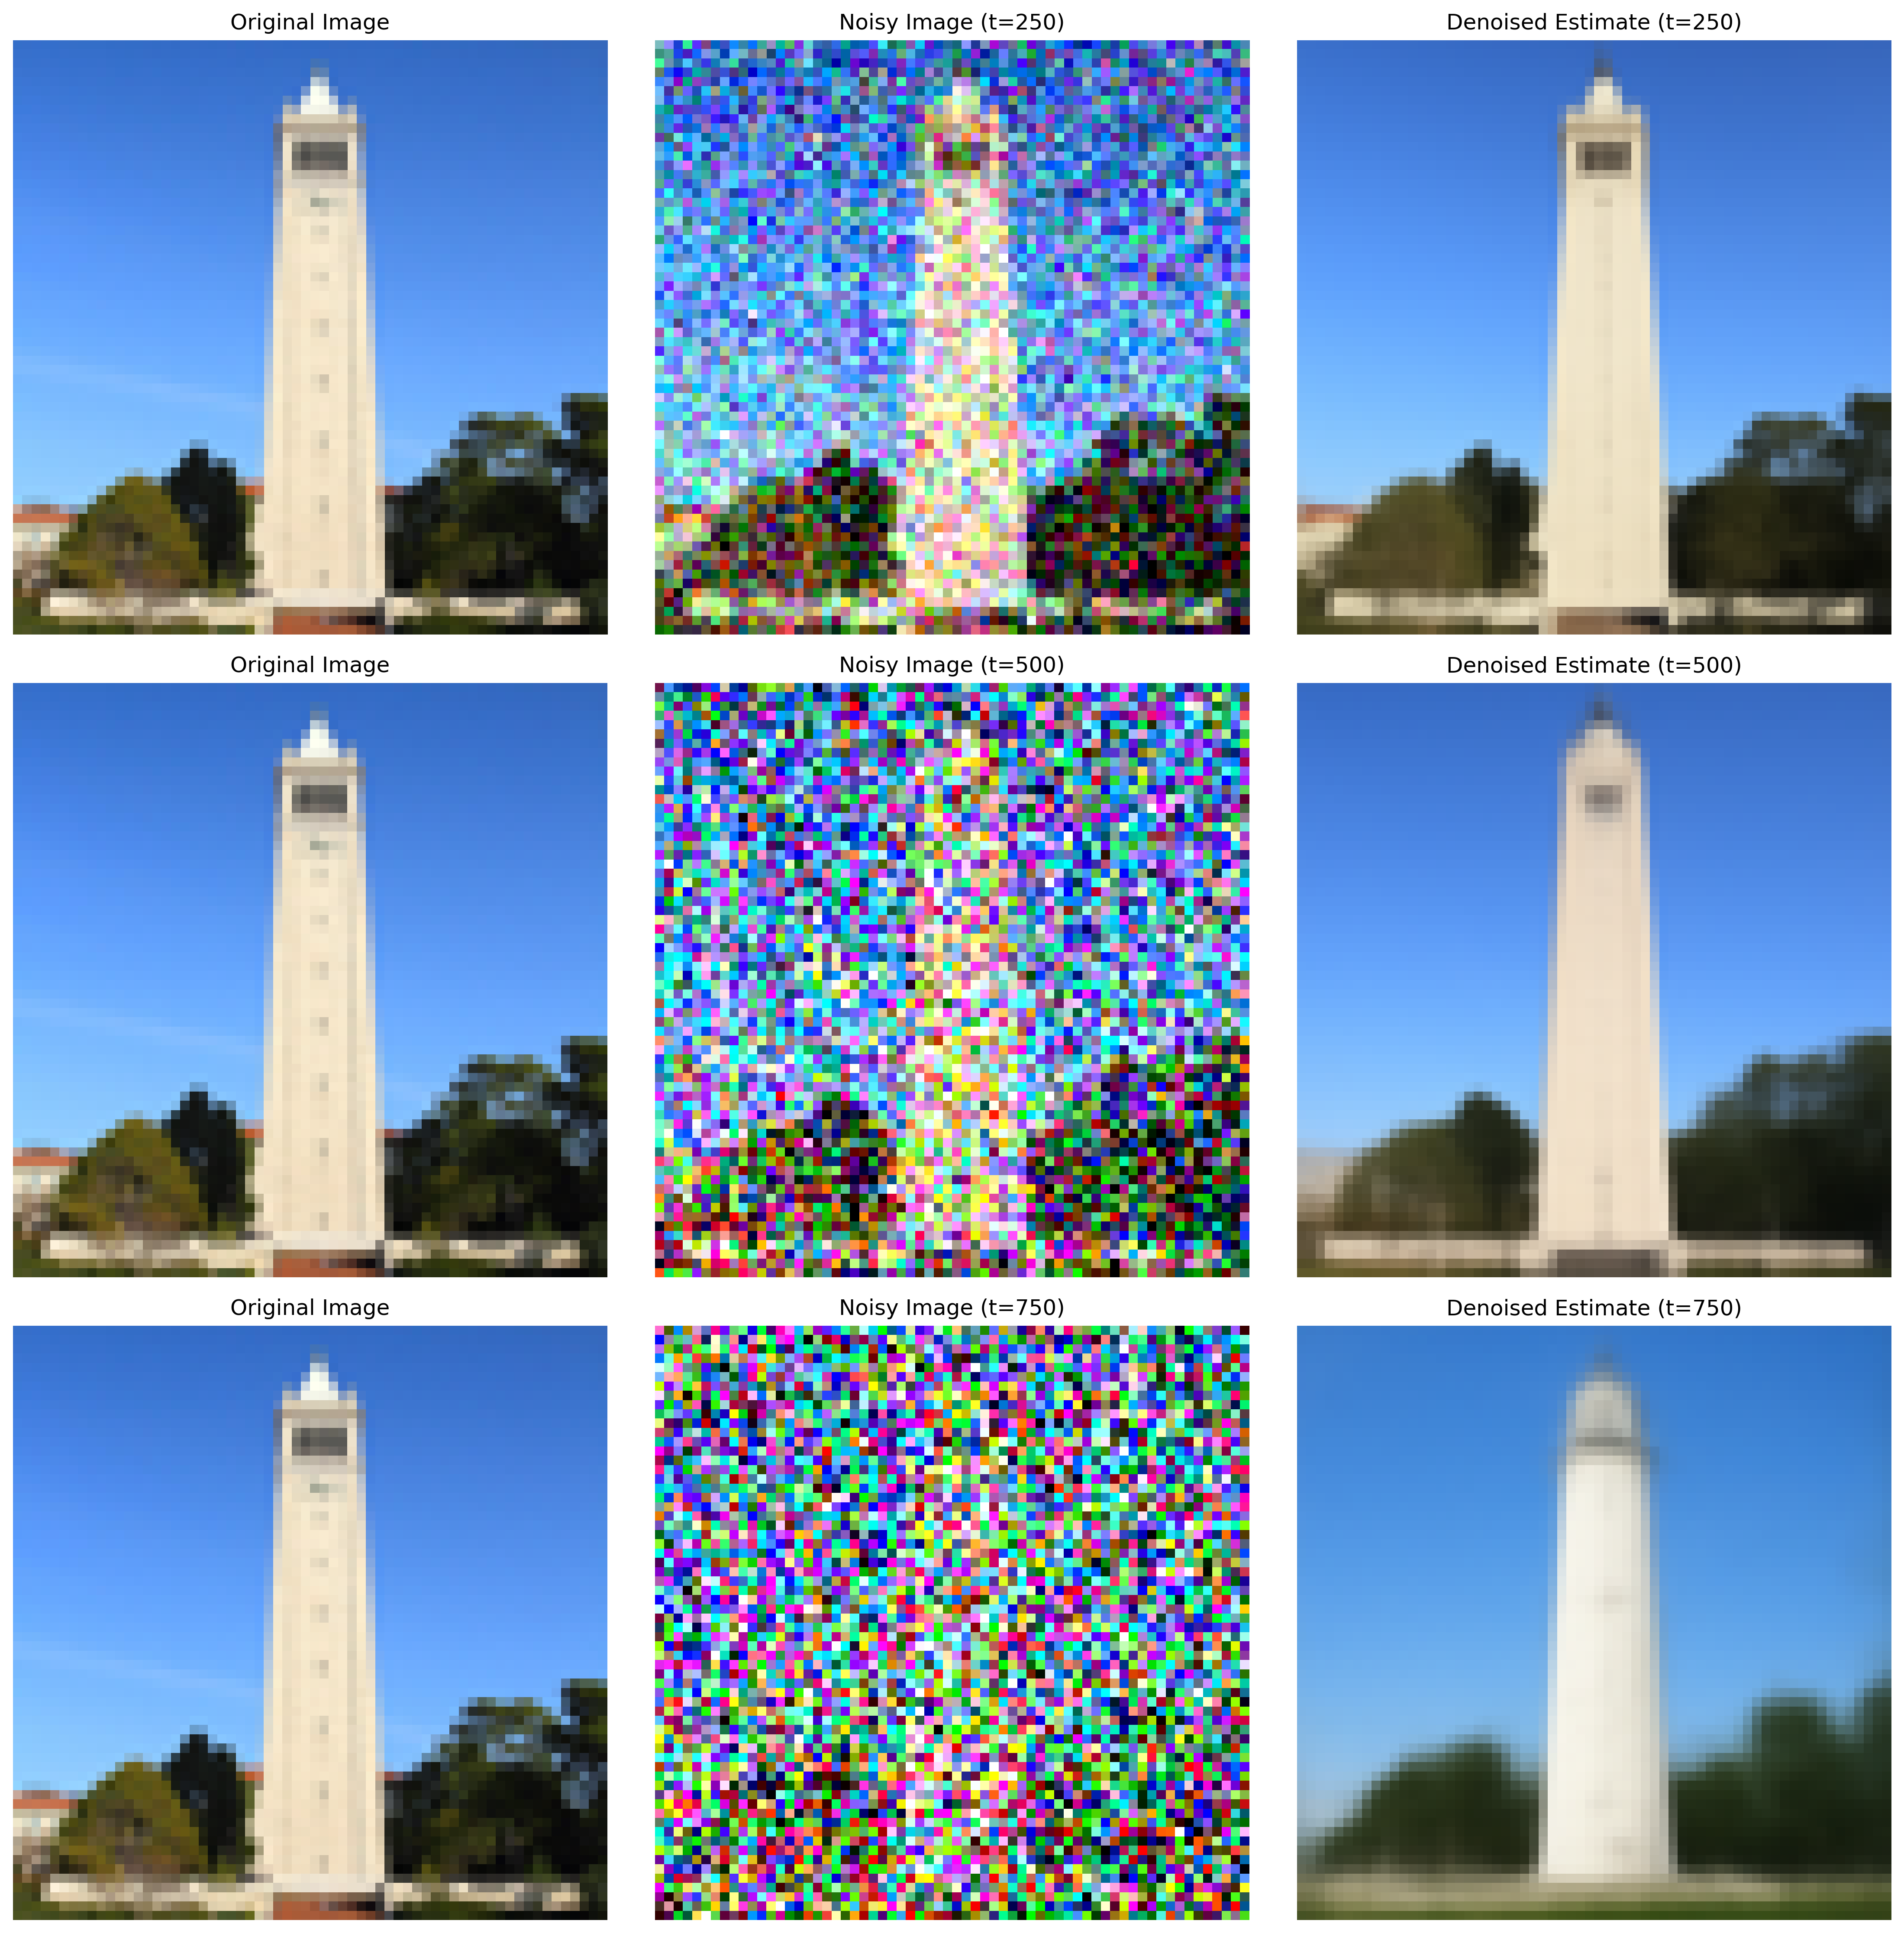
1.3. One-Step Denoising
To denoise using UNet, I first recreated the noisy images at various timesteps based on the algorithm from 1.1. Then I use the UNet to estimate the noise added between timestep 0 and t, extract it and subtract it in one go. The results are as follows
1.4. Iterative Denoising
Instead of denoising it all in one step, we can try getting better results by denoising iteratively. Starting at T=990, we take strides of 30 towards 0 to make the process shorter and cheaper by skipping some steps. The equation we use to calculate the output a time t is

The results are as follows:
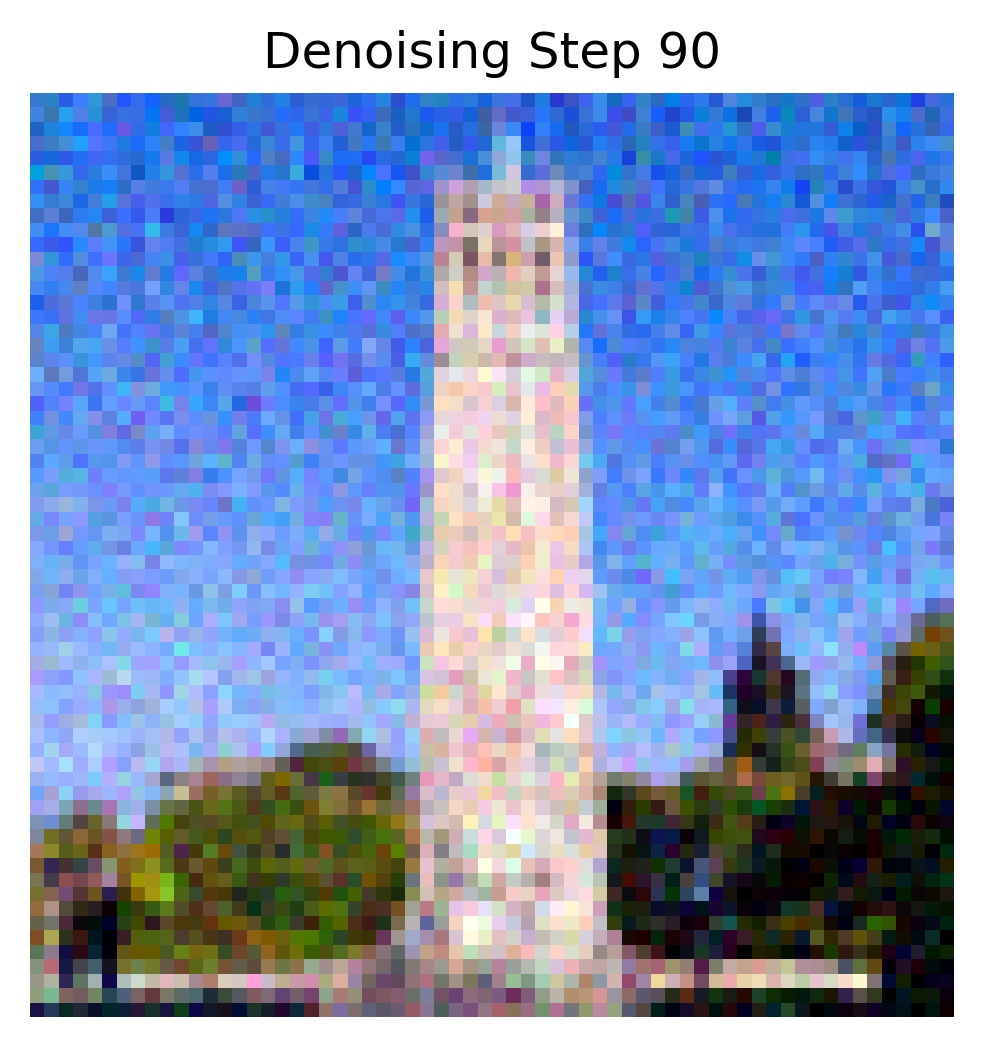
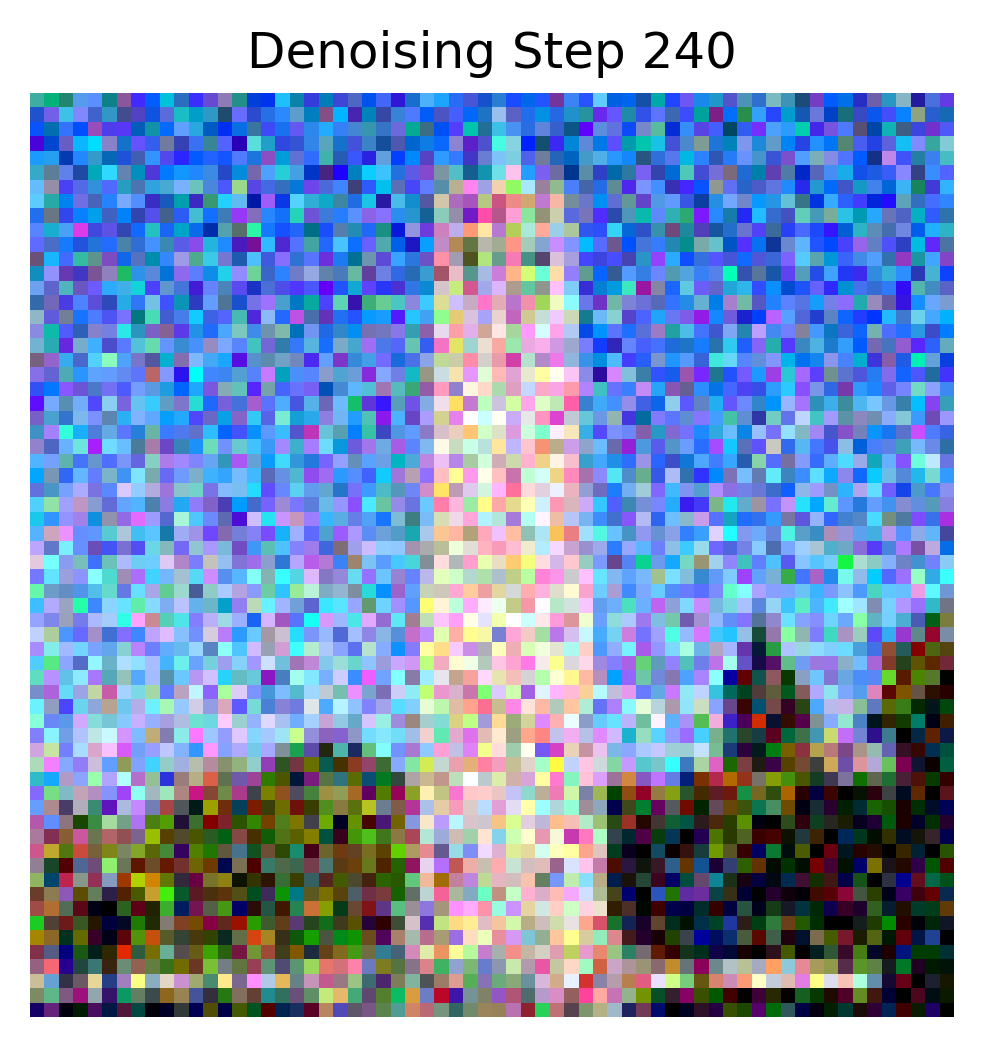
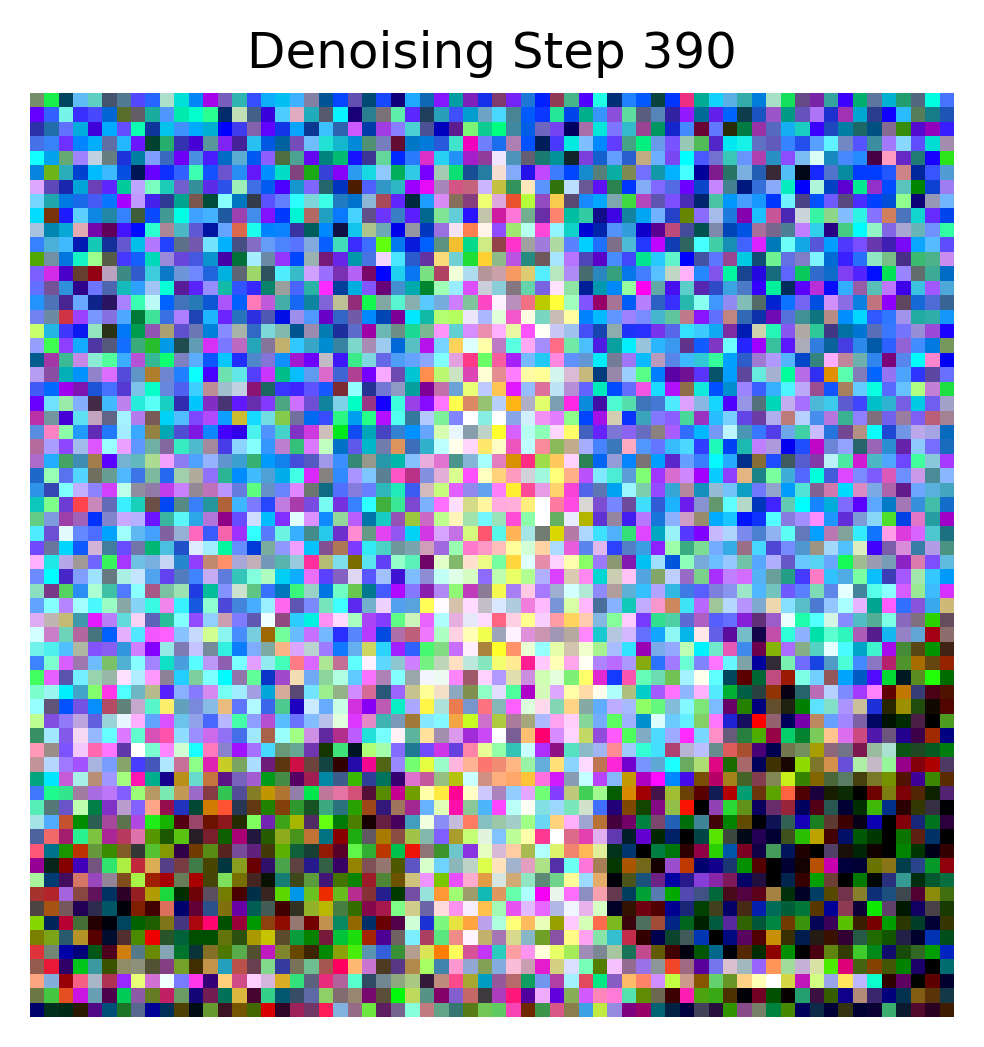
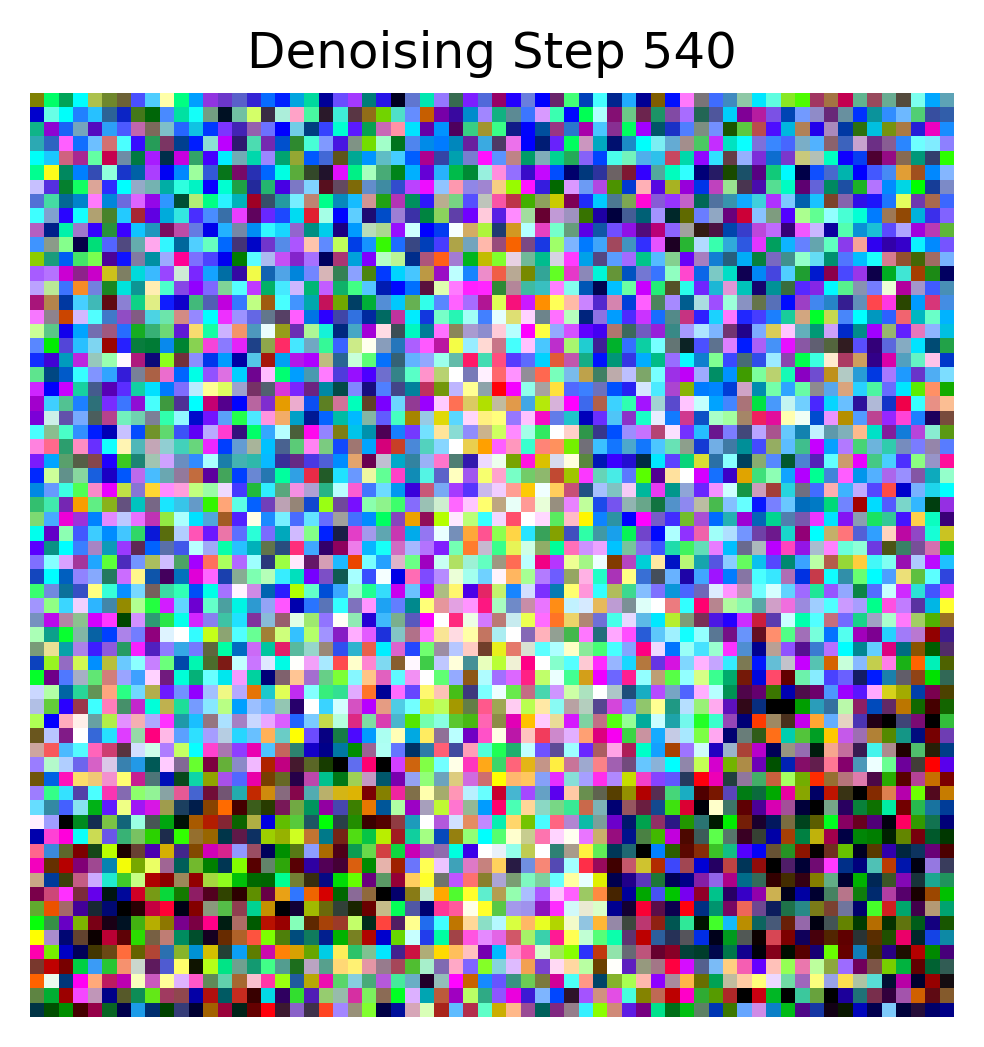
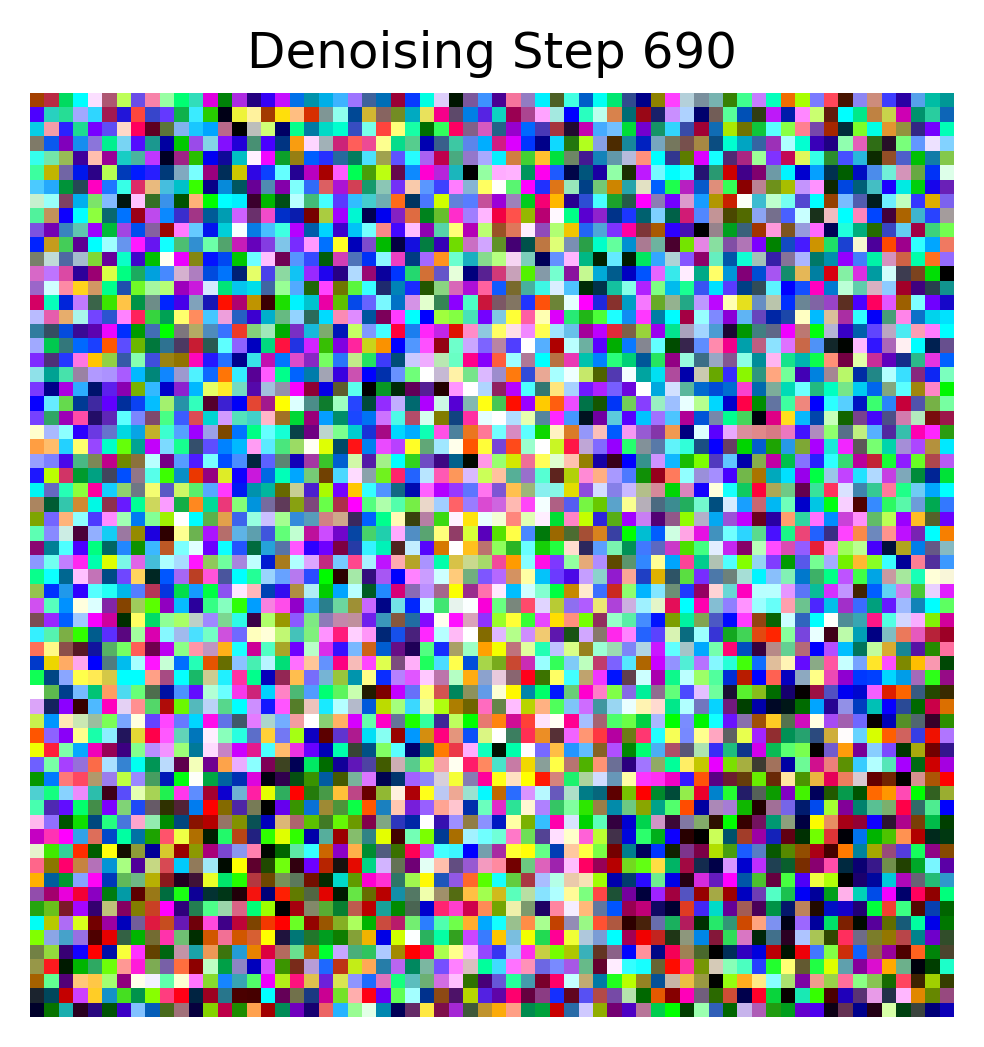
Here is a summary of all the denoising strategies we've tried so far. From left to right we have one step denoising, gaussian blur and iterative denoising:

1.5. Diffusion Model Sampling
Using the function from 1.4. I generated 5 sample images with
i_start=0 and pure noise as the input wiht the prompt
"a high quality photo" to see what it would output

1.6. Classifier-Free Guidance (CFG)
To improve the quality of the images we can use Classifier Free Guidance to compute a conditional noise estimate, and an unconditional one. The overall noise is then estimated to be:

With the scale set to 7 and "a high quality photo" set as the conditional prompt and "" as the unconditional prompt, I generated the following 5 samples:

1.7. Image-to-image translation
Using iterative denoise with CFG we can generate an image to become closer to our source image. This can be done by adding timesteps with noise, passing back into CFG denoise to get an output closer to the original image. I used the indicies at noise levels [1, 3, 5, 7, 10, 20] with text prompt "a high quality photo"
This was the result for the test Campinile image:
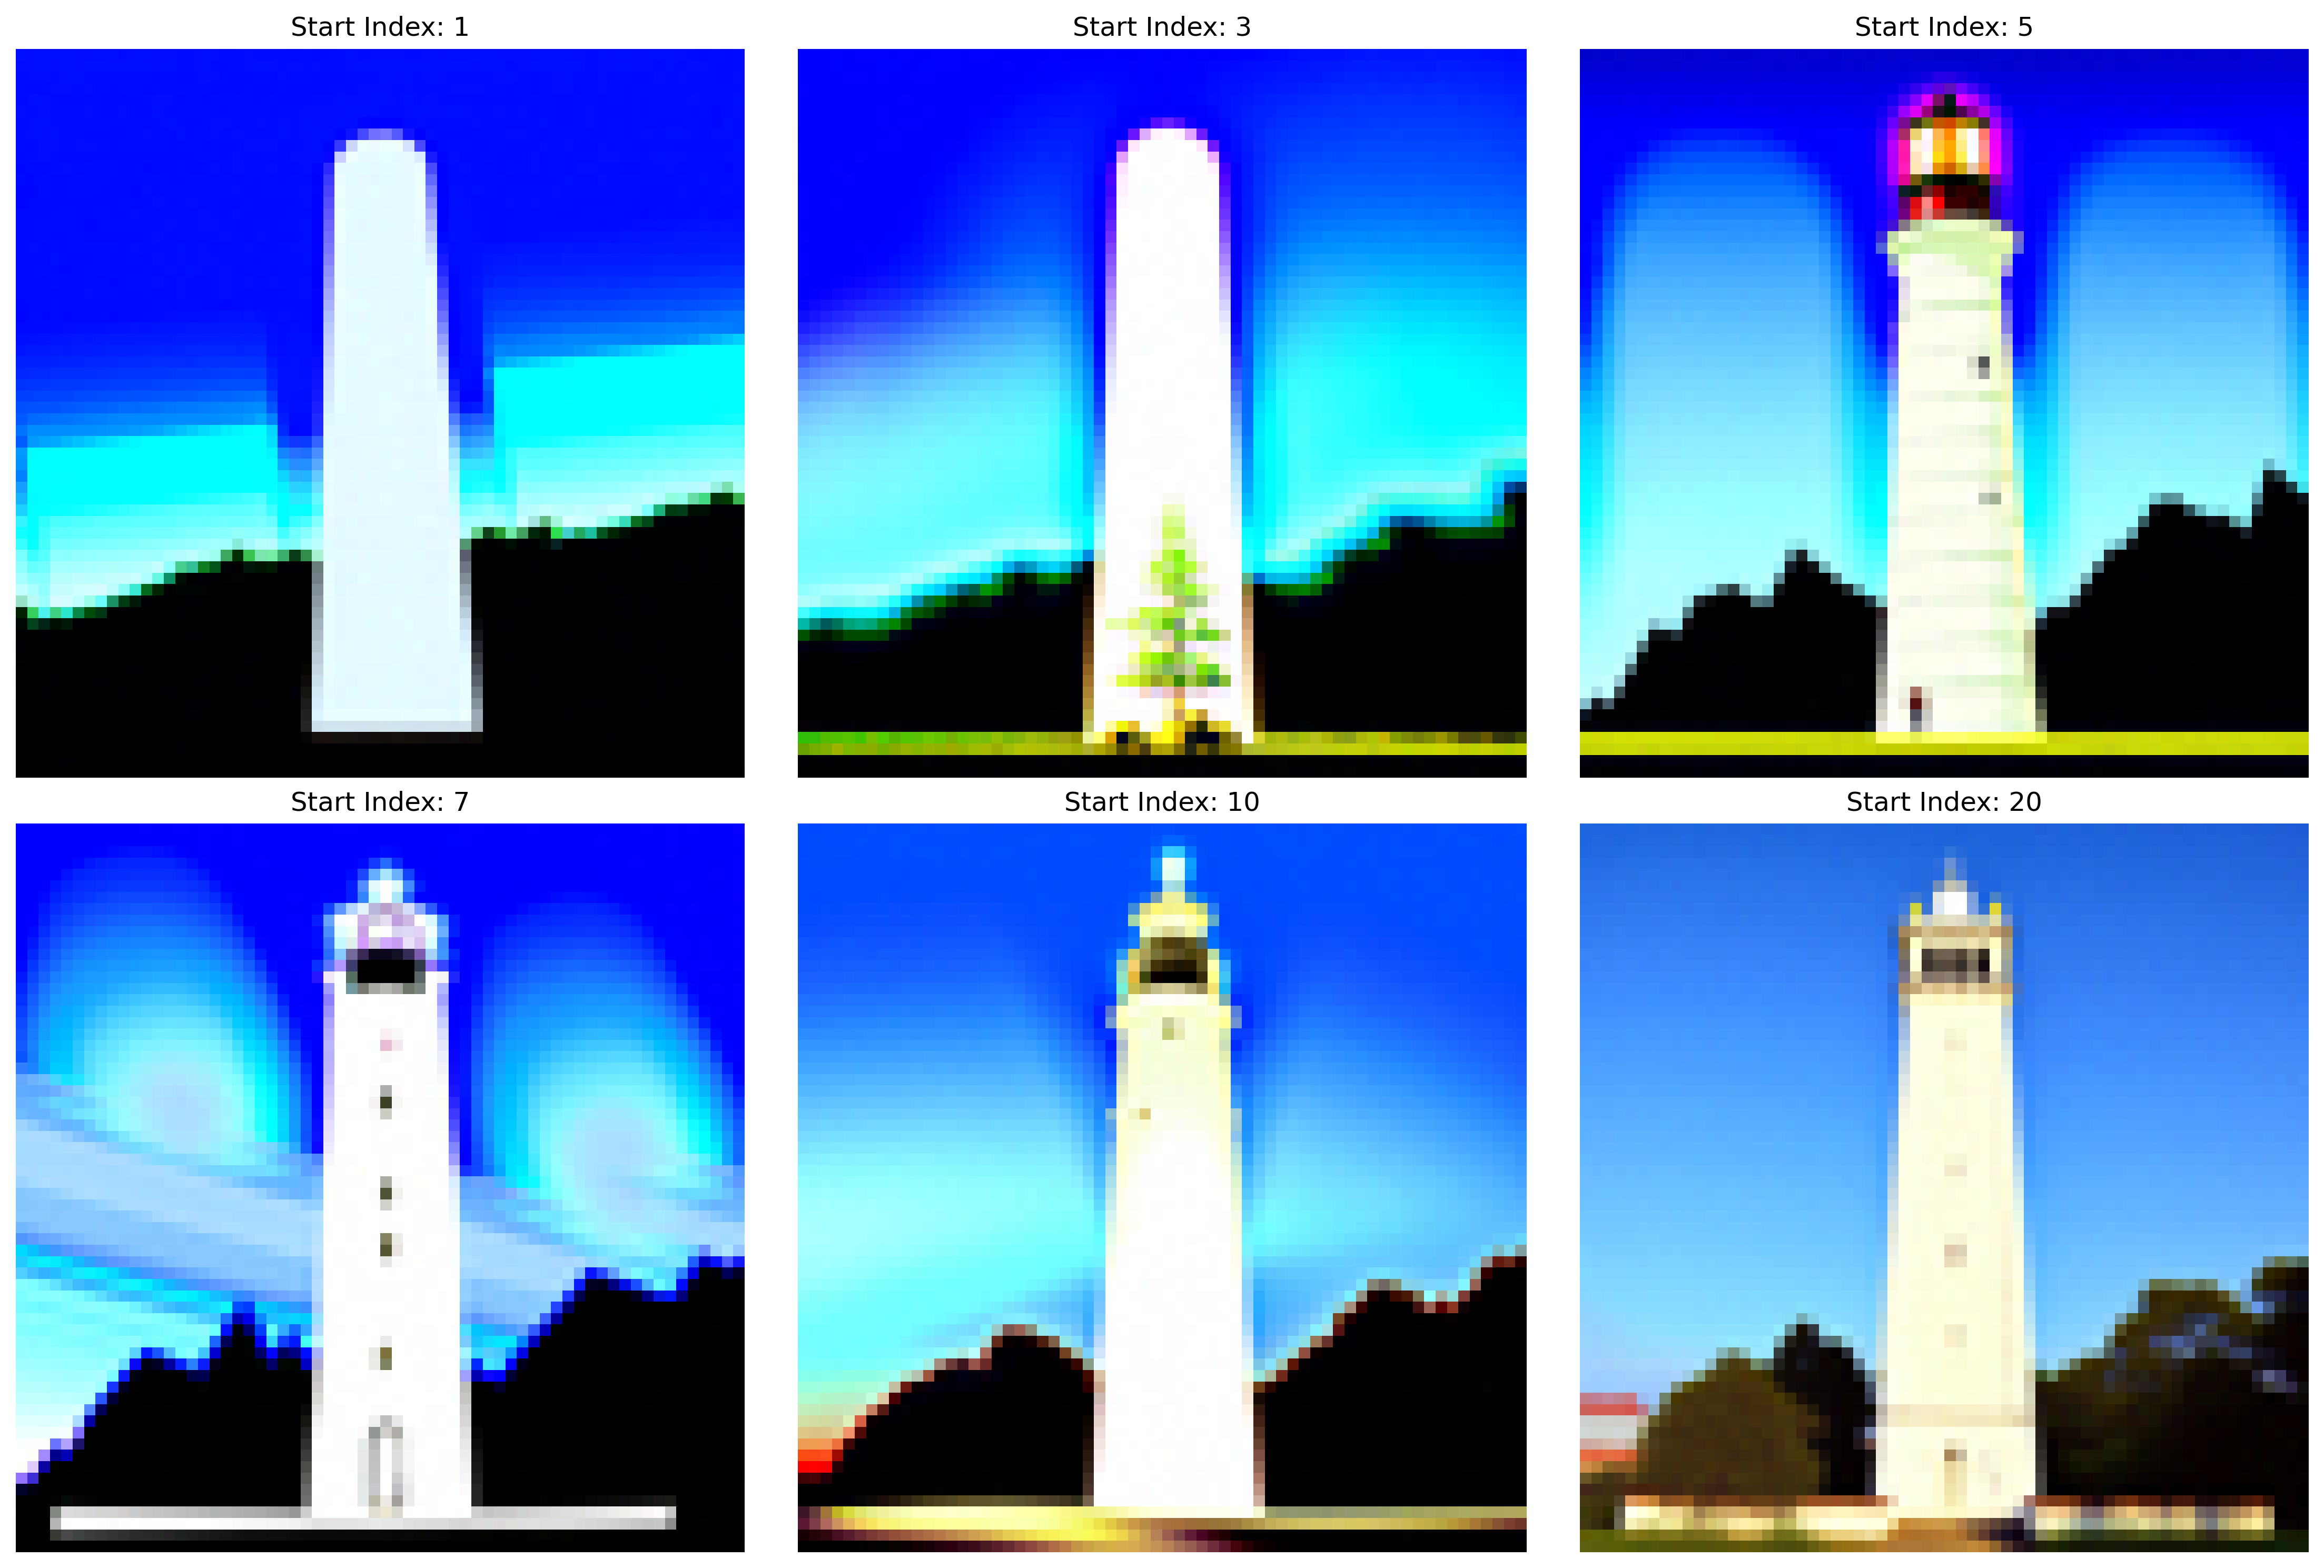
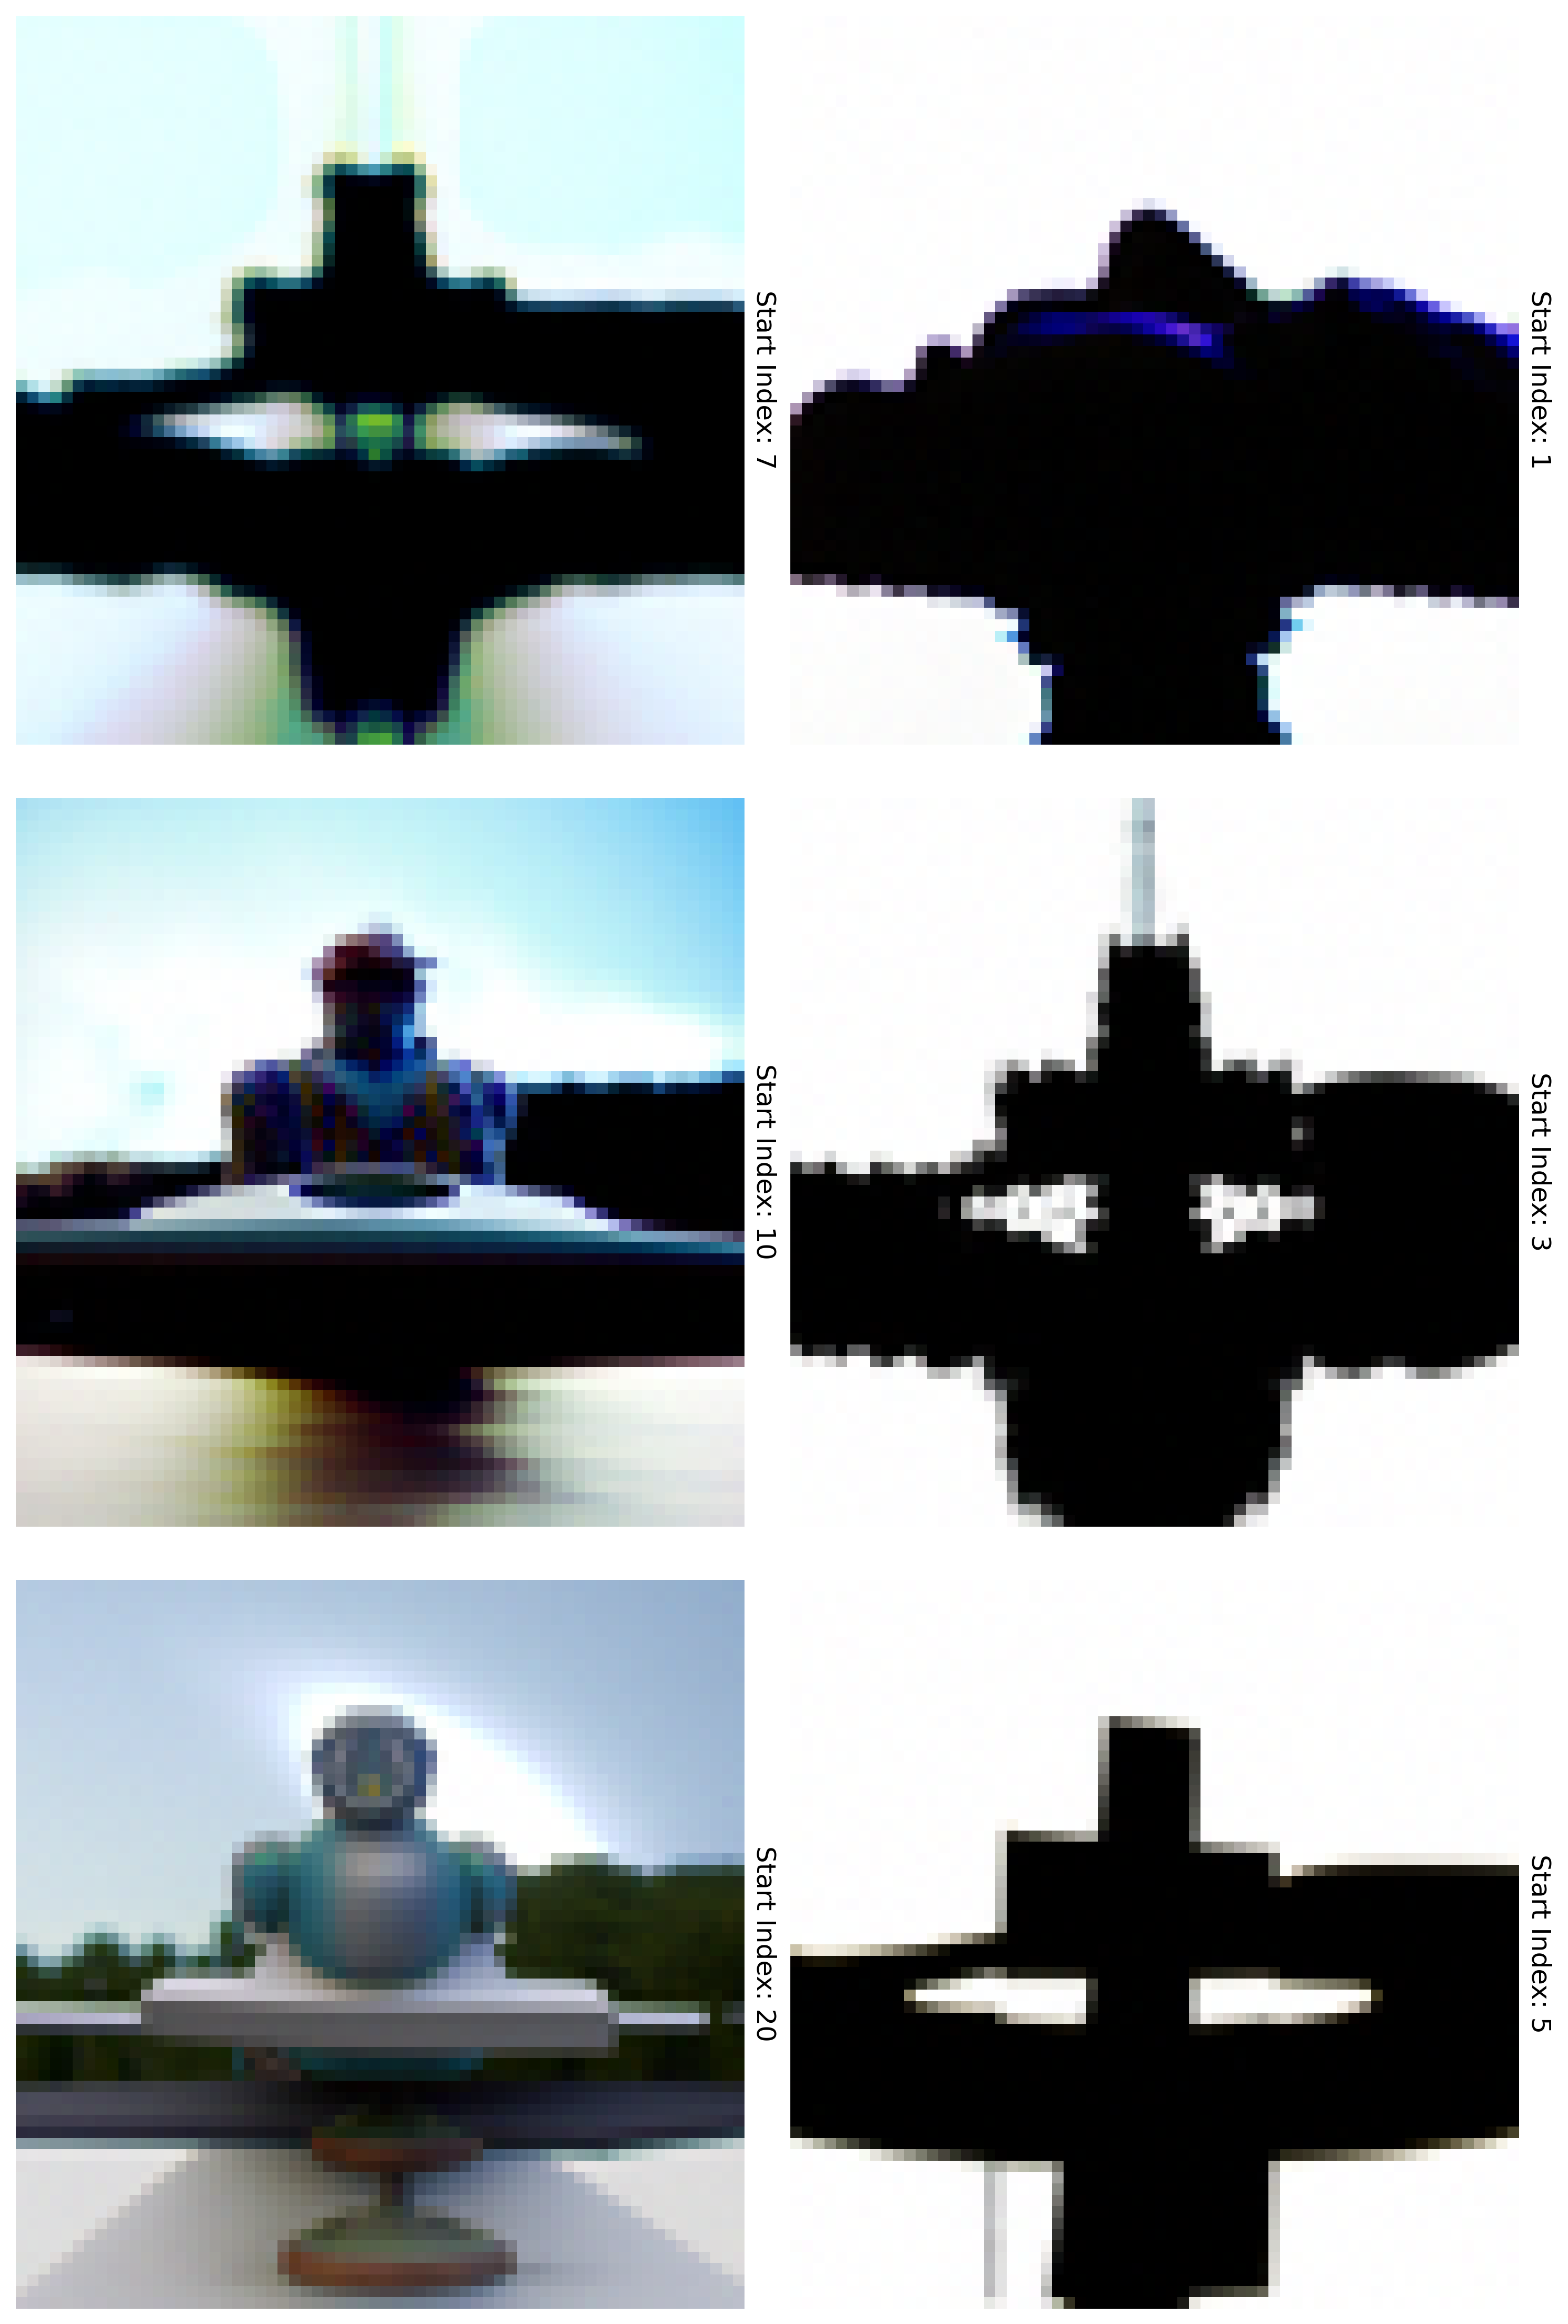
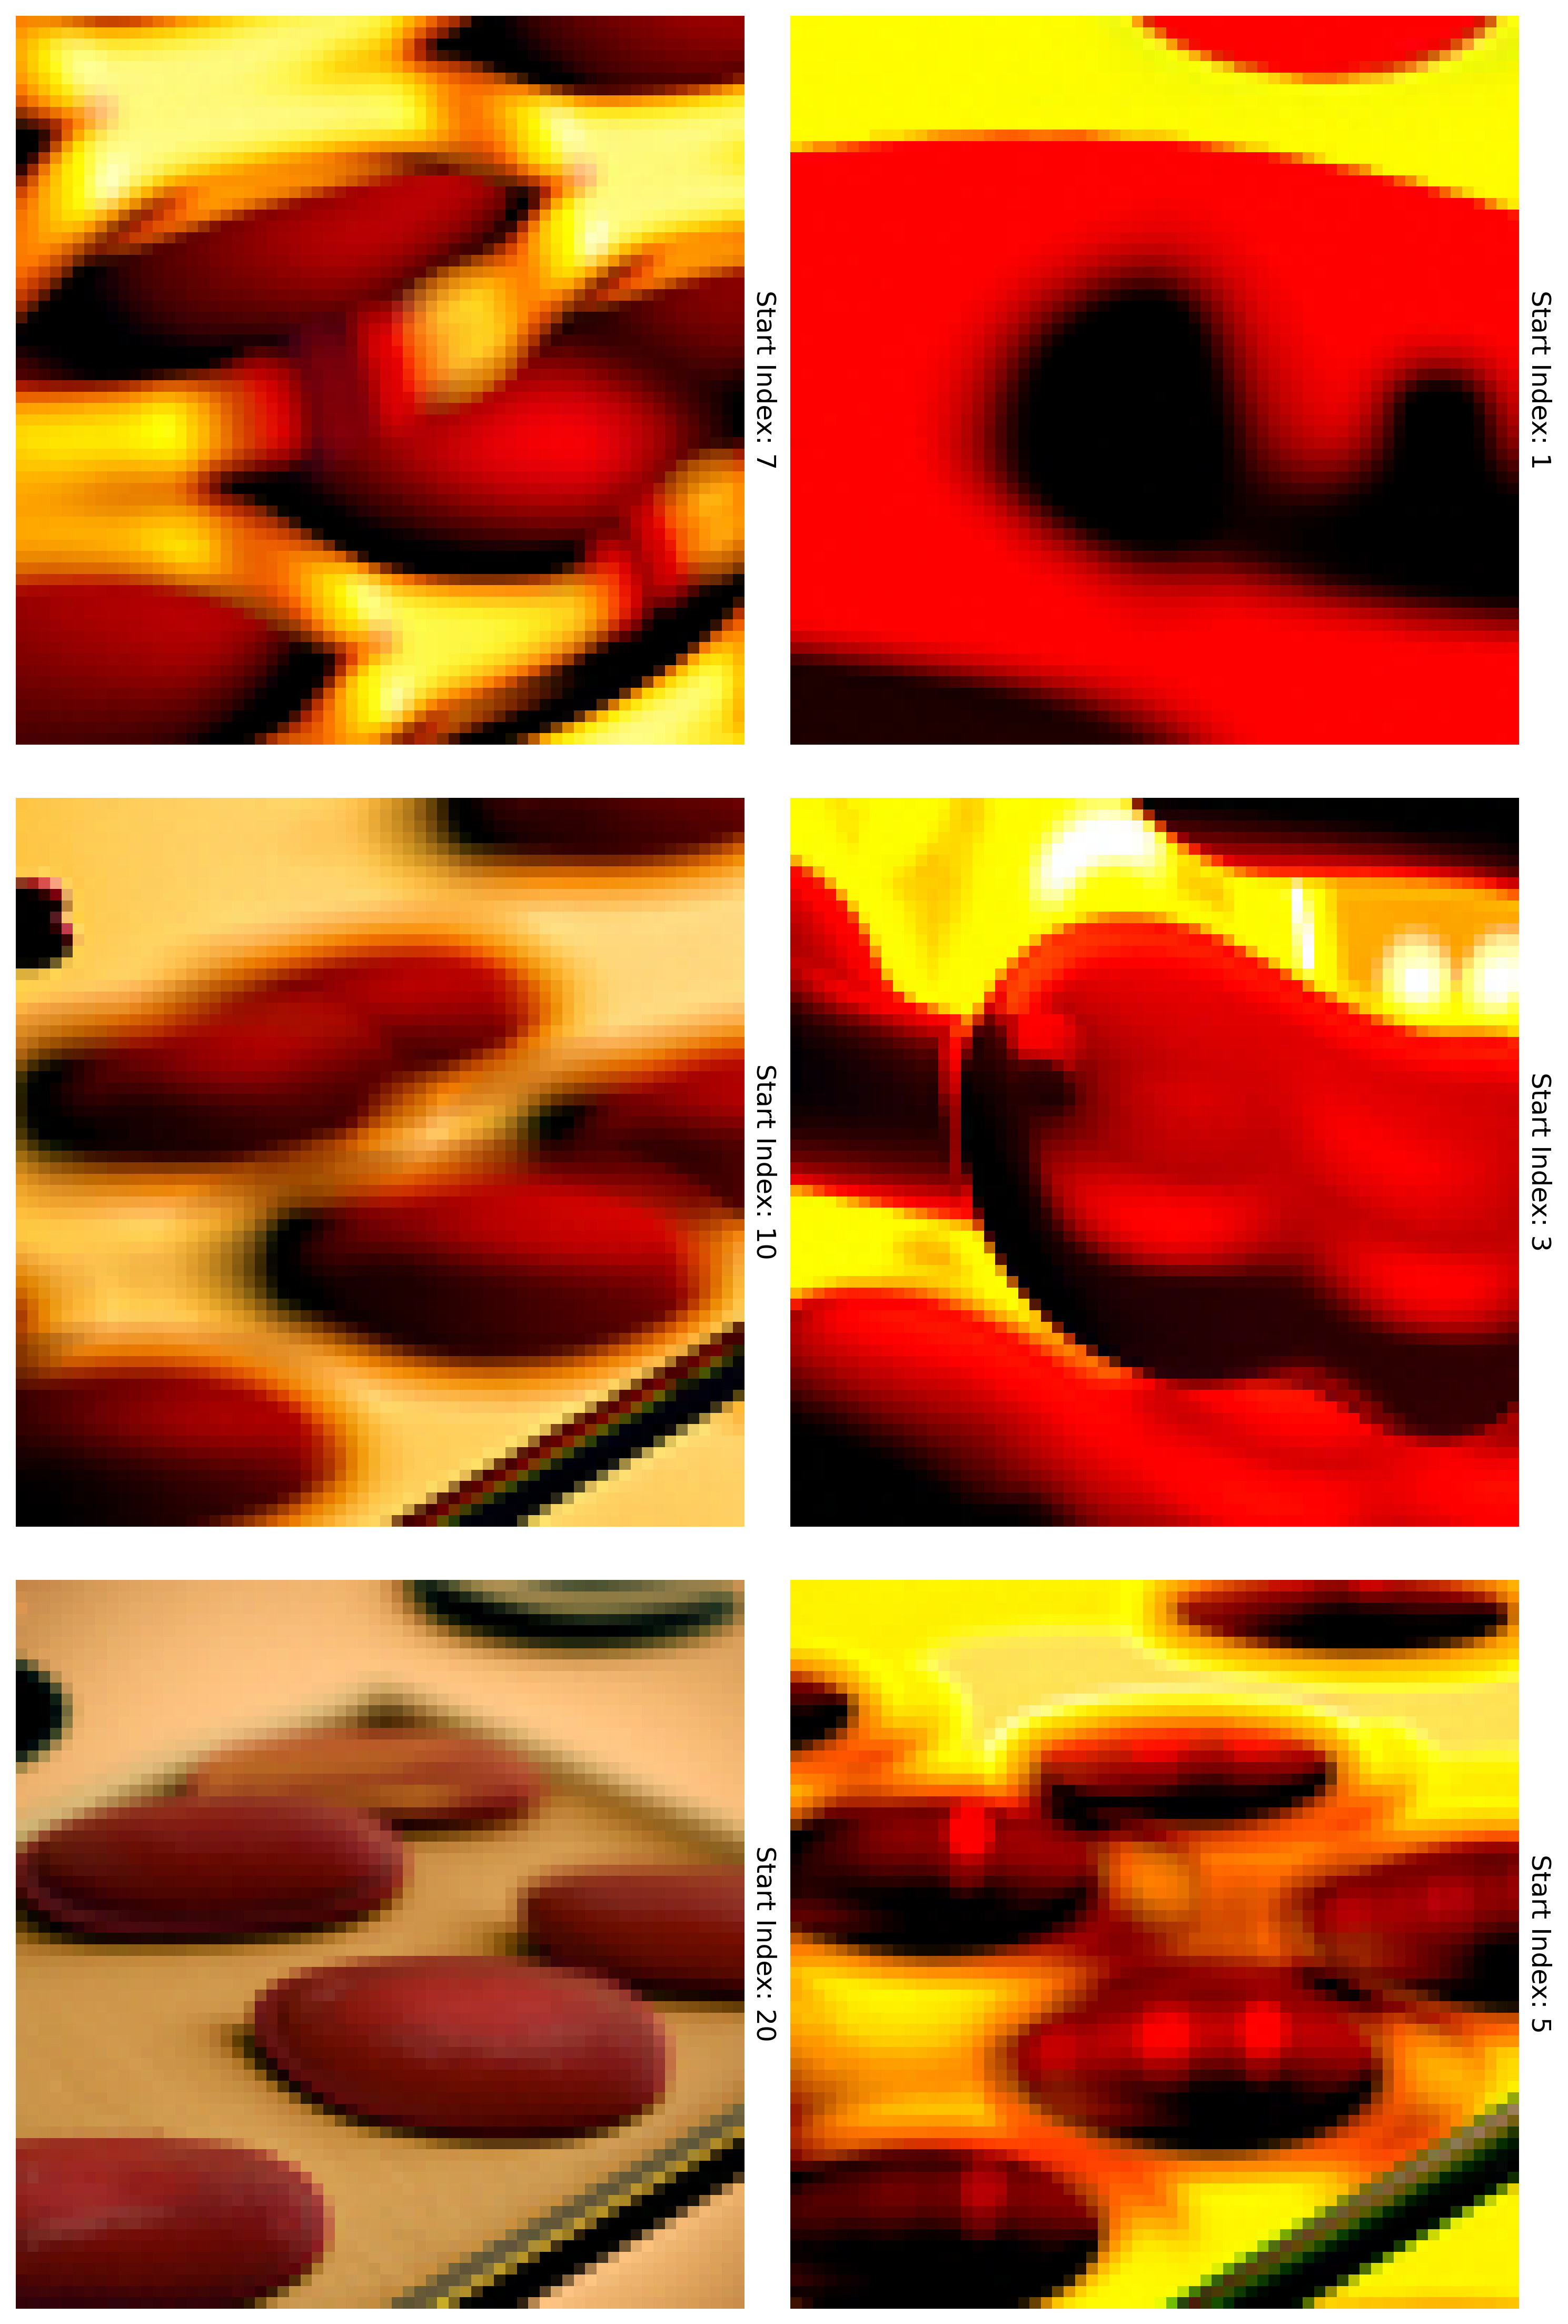
I then tried the same process with two other images: one of a statue and one of sushi

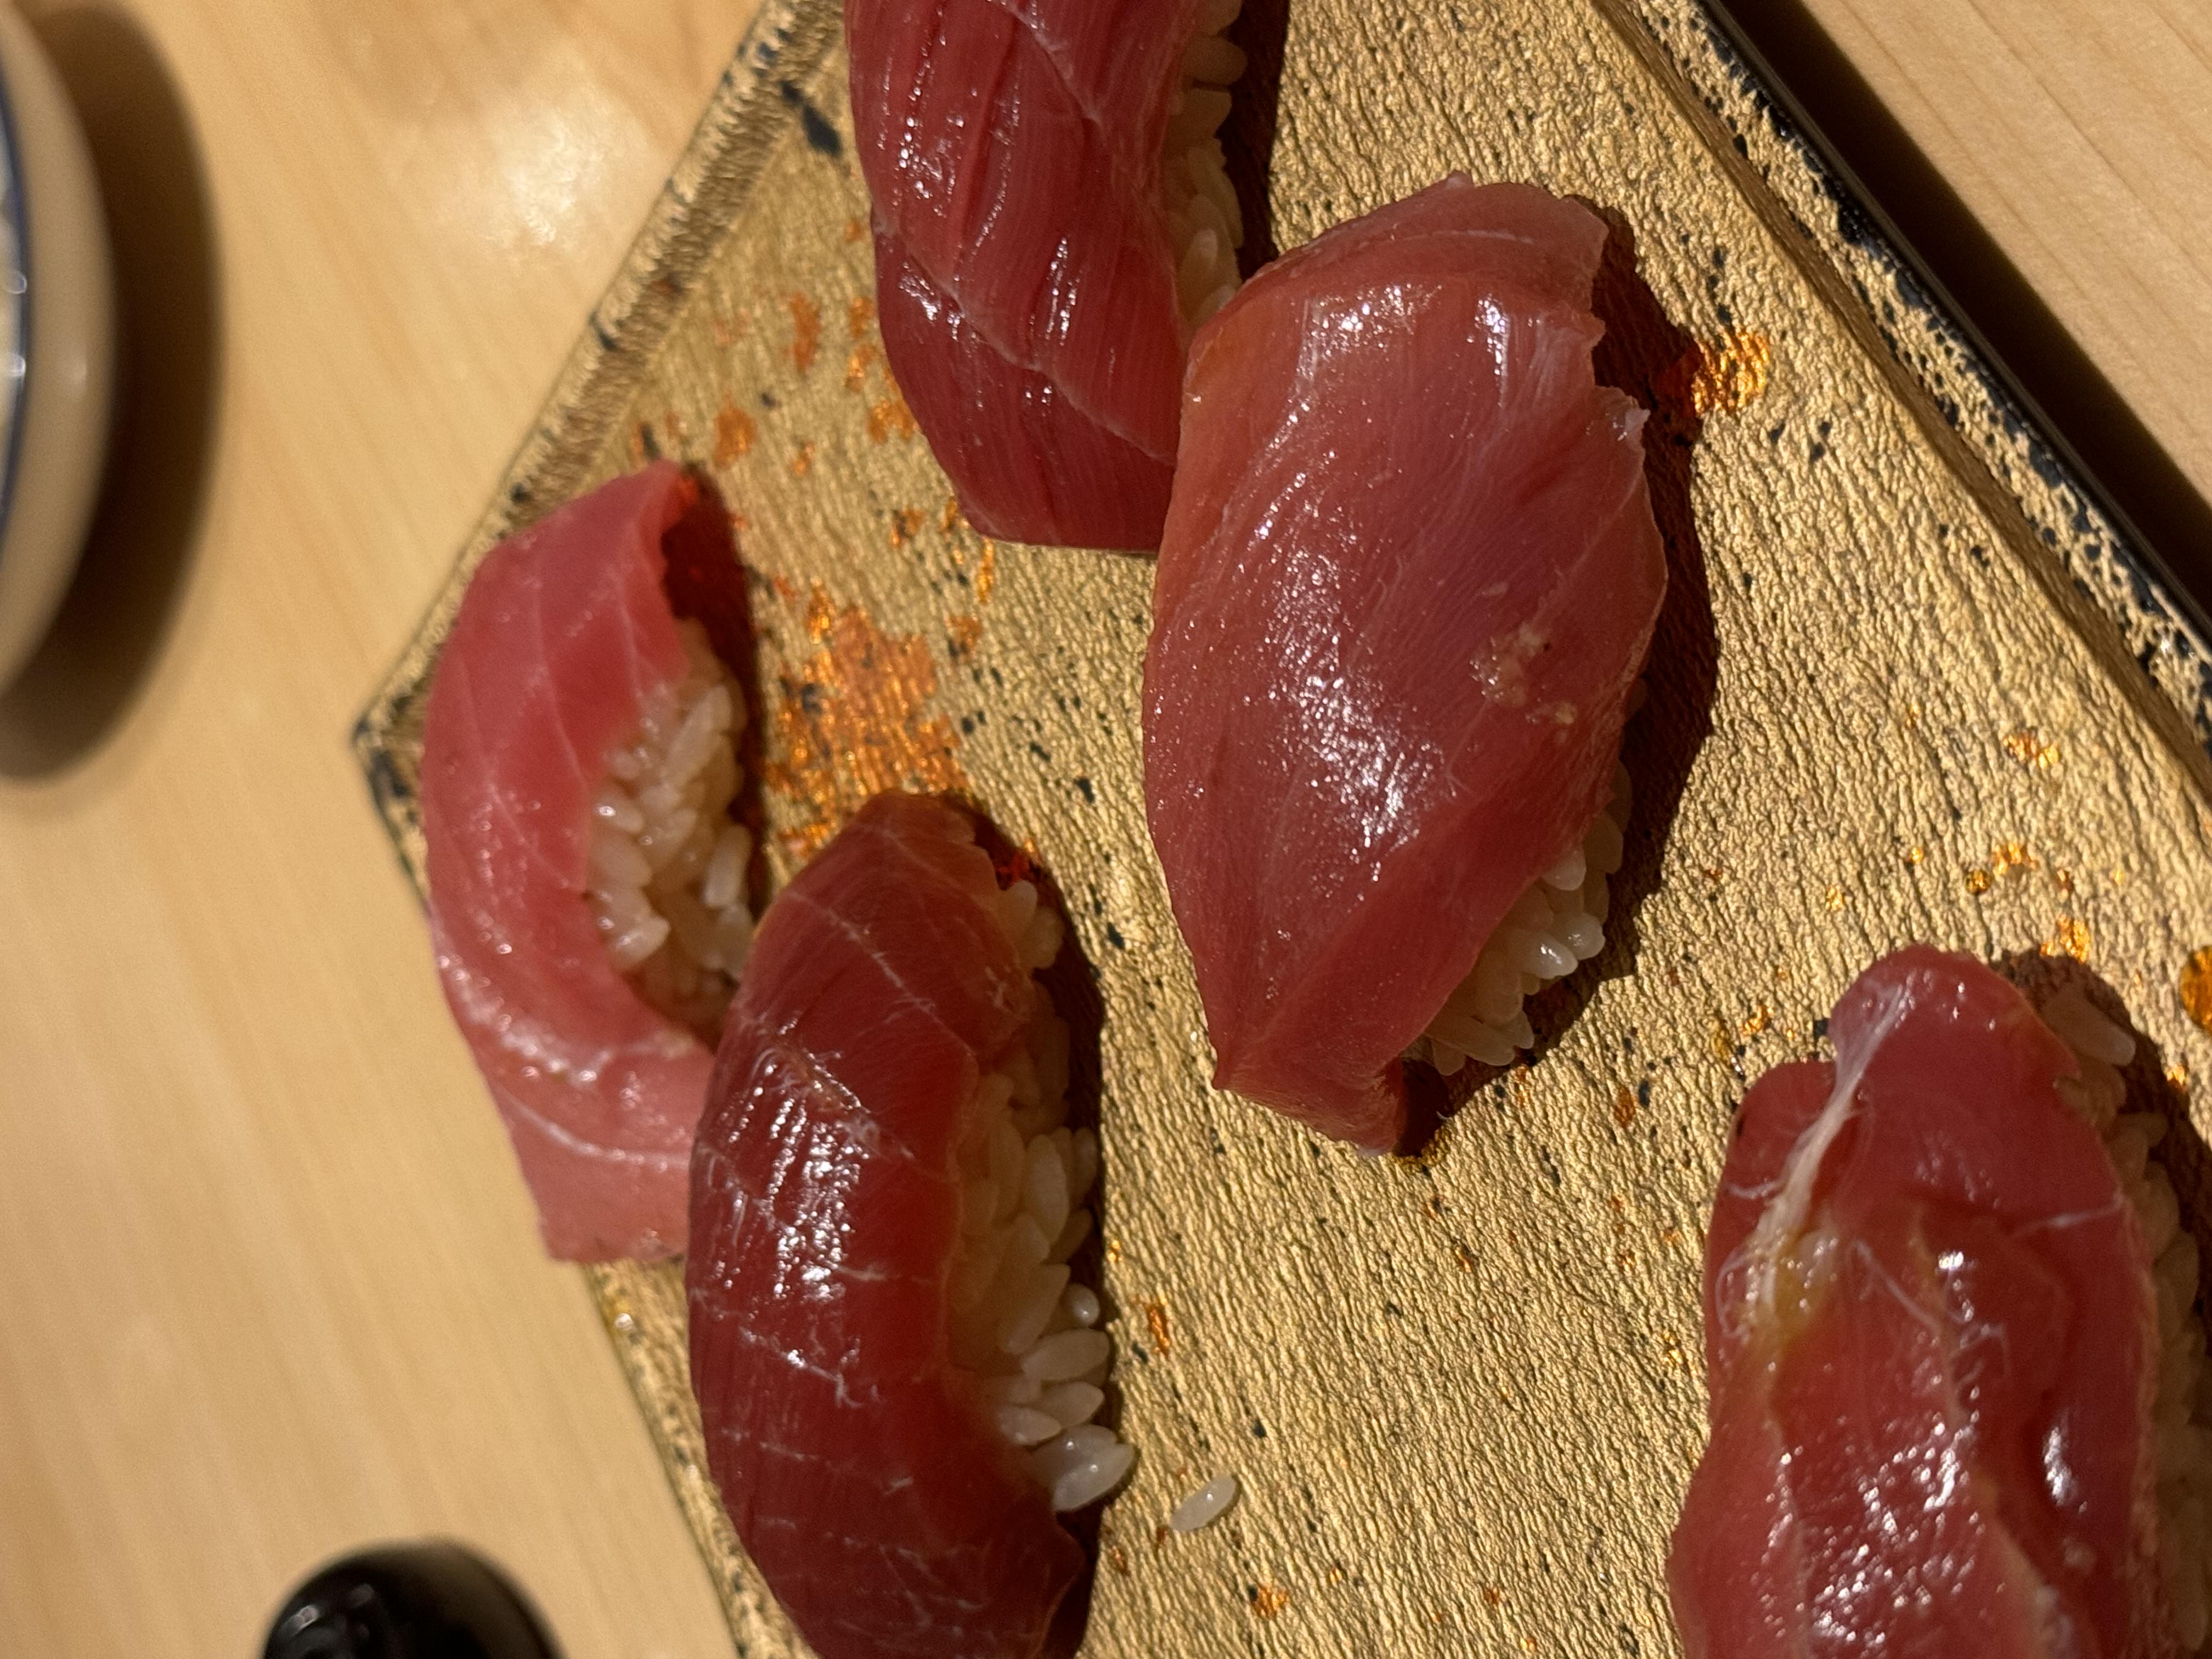
Which lead to the following results with indicies 1,3,5 on the right and 7,10,20 on the left:
1.7.1 Editing Hand-Drawn and Web Images
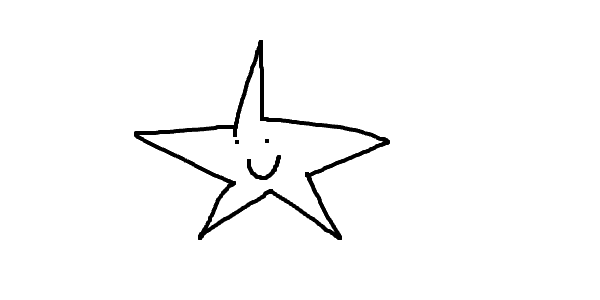
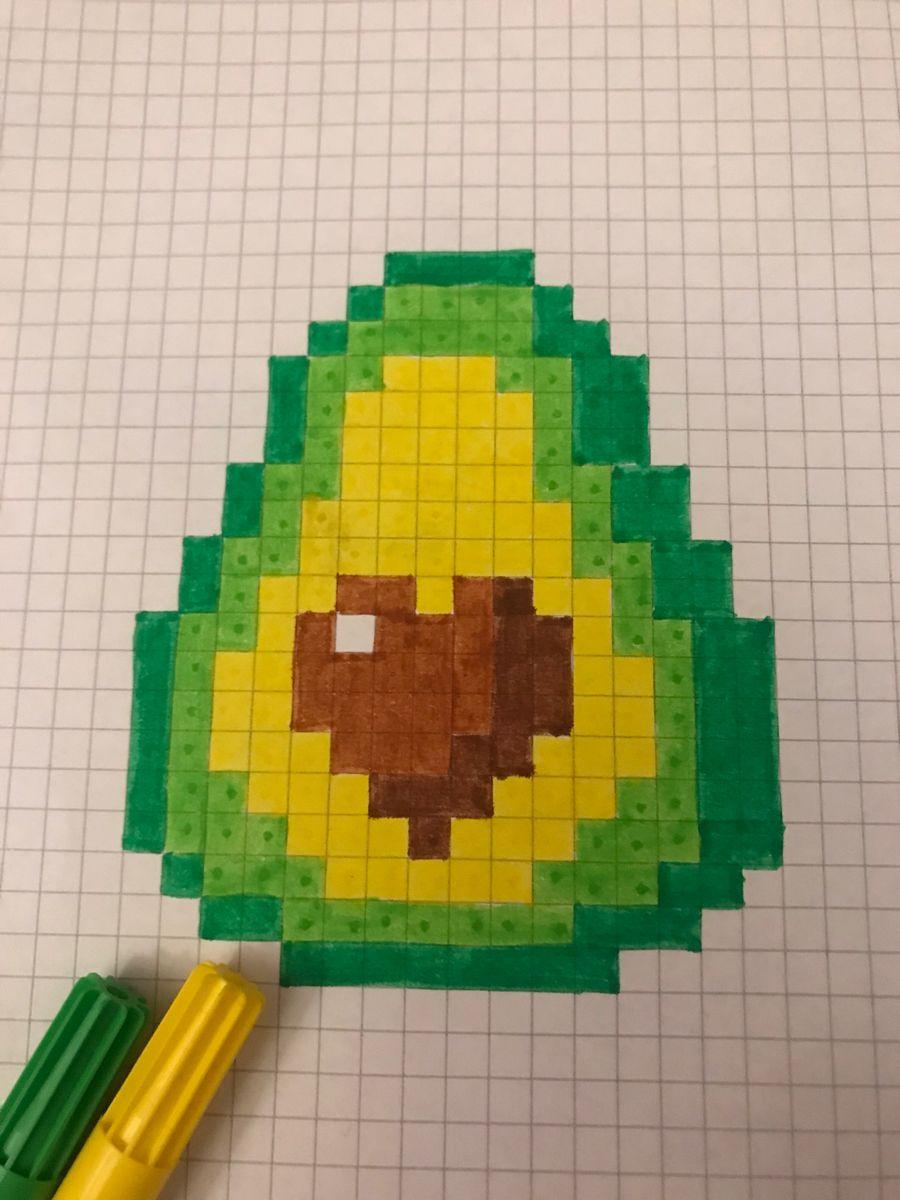
The image-to-image translation also works when we have a non-realistic image that we want to convert into a realistic one. We demonstrate this using a hand-drawn image and searched images from the internet.

Noise Level: 1

Noise Level: 3

Noise Level: 5

Noise Level: 7

Noise Level: 10

Noise Level: 20

Original

Noise Level: 1

Noise Level: 3

Noise Level: 5

Noise Level: 7

Noise Level: 10

Noise Level: 20
Original

Noise Level: 1

Noise Level: 3

Noise Level: 5

Noise Level: 7

Noise Level: 10

Noise Level: 20
Original
1.7.2. Inpainting
Using iterative denoising with CFG to inpaint. I define a mask and fill it with a generated image. Here are the results:

Original Image

Mask

To Inpaint

Result

Original Image

Mask

To Inpaint
.png)
Result
.jpg)
Original Image
.jpg)
Mask
.jpg)
To Inpaint

Result
1.7.3. Text-Conditional Image-to-image Translation
We've been conditioning on the text prompt "a high quality photo", but we can also try conditioning on other text prompts through text-conditional image-to-image transolation. As t decreases, it gets more similar to the prompt and further from the original.
Image: Campanile & Prompt: A Rocket Ship

Noise Level: 1

Noise Level: 3

Noise Level: 5

Noise Level: 7

Noise Level: 10

Noise Level: 20
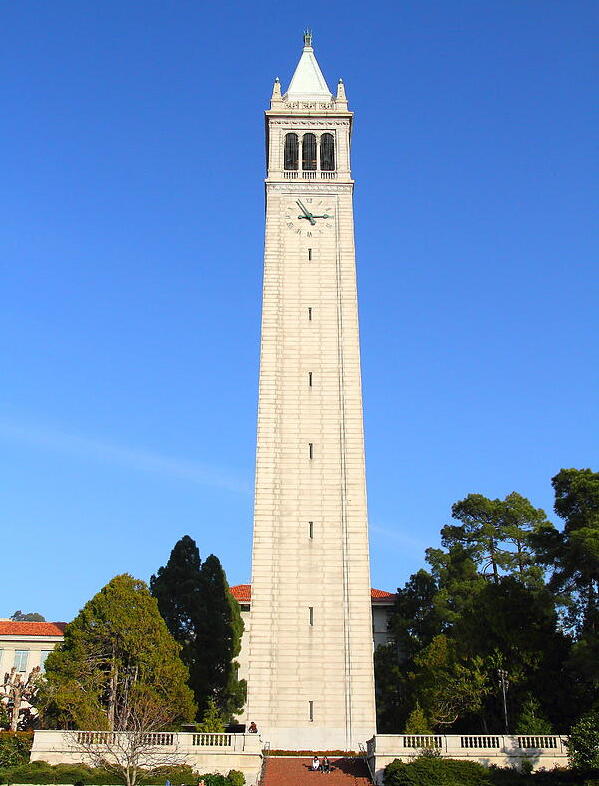
Original
Image: Chicken & Prompt: Dog

Noise Level: 1

Noise Level: 3

Noise Level: 5

Noise Level: 7

Noise Level: 10

Noise Level: 20

Original
Image: Head & Prompt: Skull

Noise Level: 1

Noise Level: 3

Noise Level: 5

Noise Level: 7

Noise Level: 10

Noise Level: 20

Original
1.8. Visual Anagrams
We can also use the text-conditional image-to-image translation to generate visual anagrams. Visual anagrams are when we flip the image by 180 degrees we can see the other prompt come out
"an oil painting of people around a campfire" and "an oil painting of an old man"

an oil painting of an old man

an oil painting of people around a campfire
'a photo of the amalfi cost' and "an oil painting of a snowy mountain village"

an oil painting of a snowy mountain village

a photo of the amalfi cost
'an oil painting of an old man' and 'a photo of a hipster barista'

a photo of a hipster barista

an oil painting of an old man
1.9. Hybrid Images
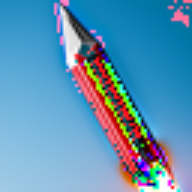
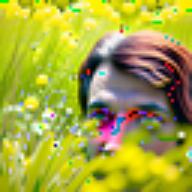
Hybrid images display one image from far away and another when closer. This is done using highpass and lowpass filters as frequencies that change as we move closer/farther from an image.
Rocket & Pencil

Dog & Man

Skull & Waterfalls


Part B 🍀
In this section, we train our own diffusion model to produce images based on the MNIST dataset.
Part 1: Training a Single-Step Denoising UNet
We first start with implementing a simple one-step denoiser. Here are the results of adding Gaussian noise to a clean image x according to z=x+σϵ where ϵ N(0,I) for different values of σ:
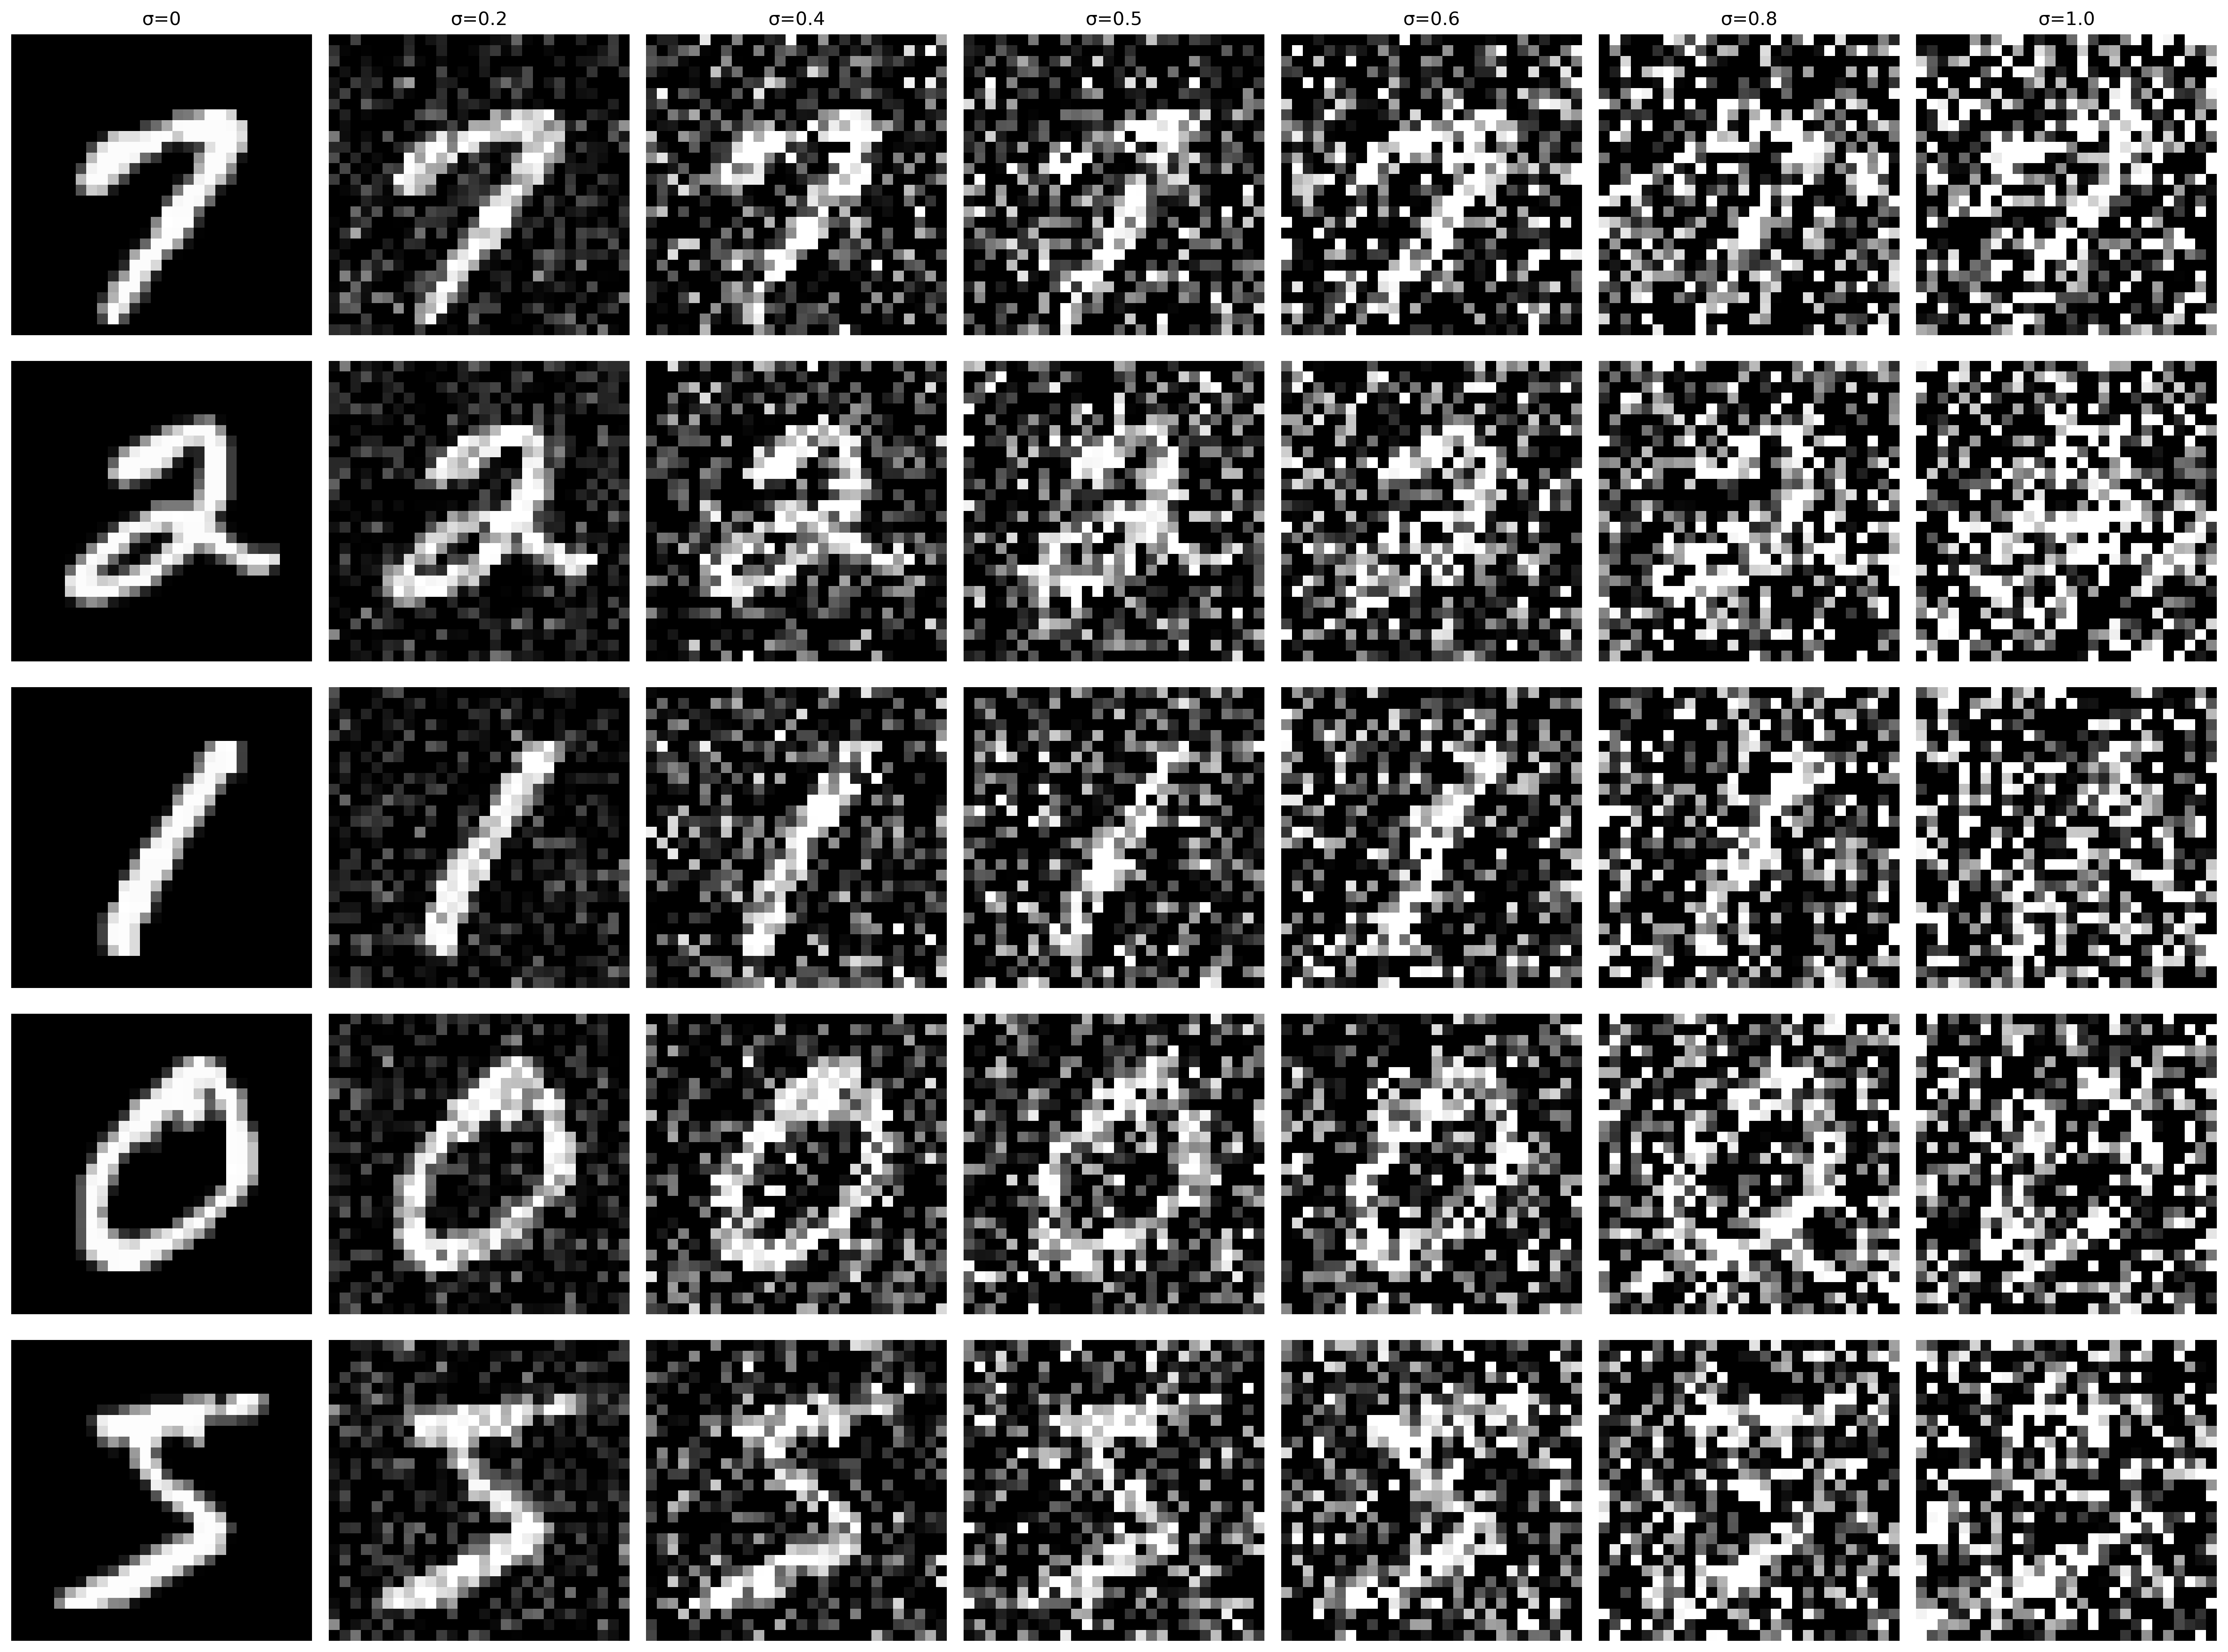
I then implemented trained the unconditional UNet on noisy images generated with σ=0.5 on 5 epochs. This is the training loss for the single step denoiser:
.png)
And here are the results from the first and fifth epoch:
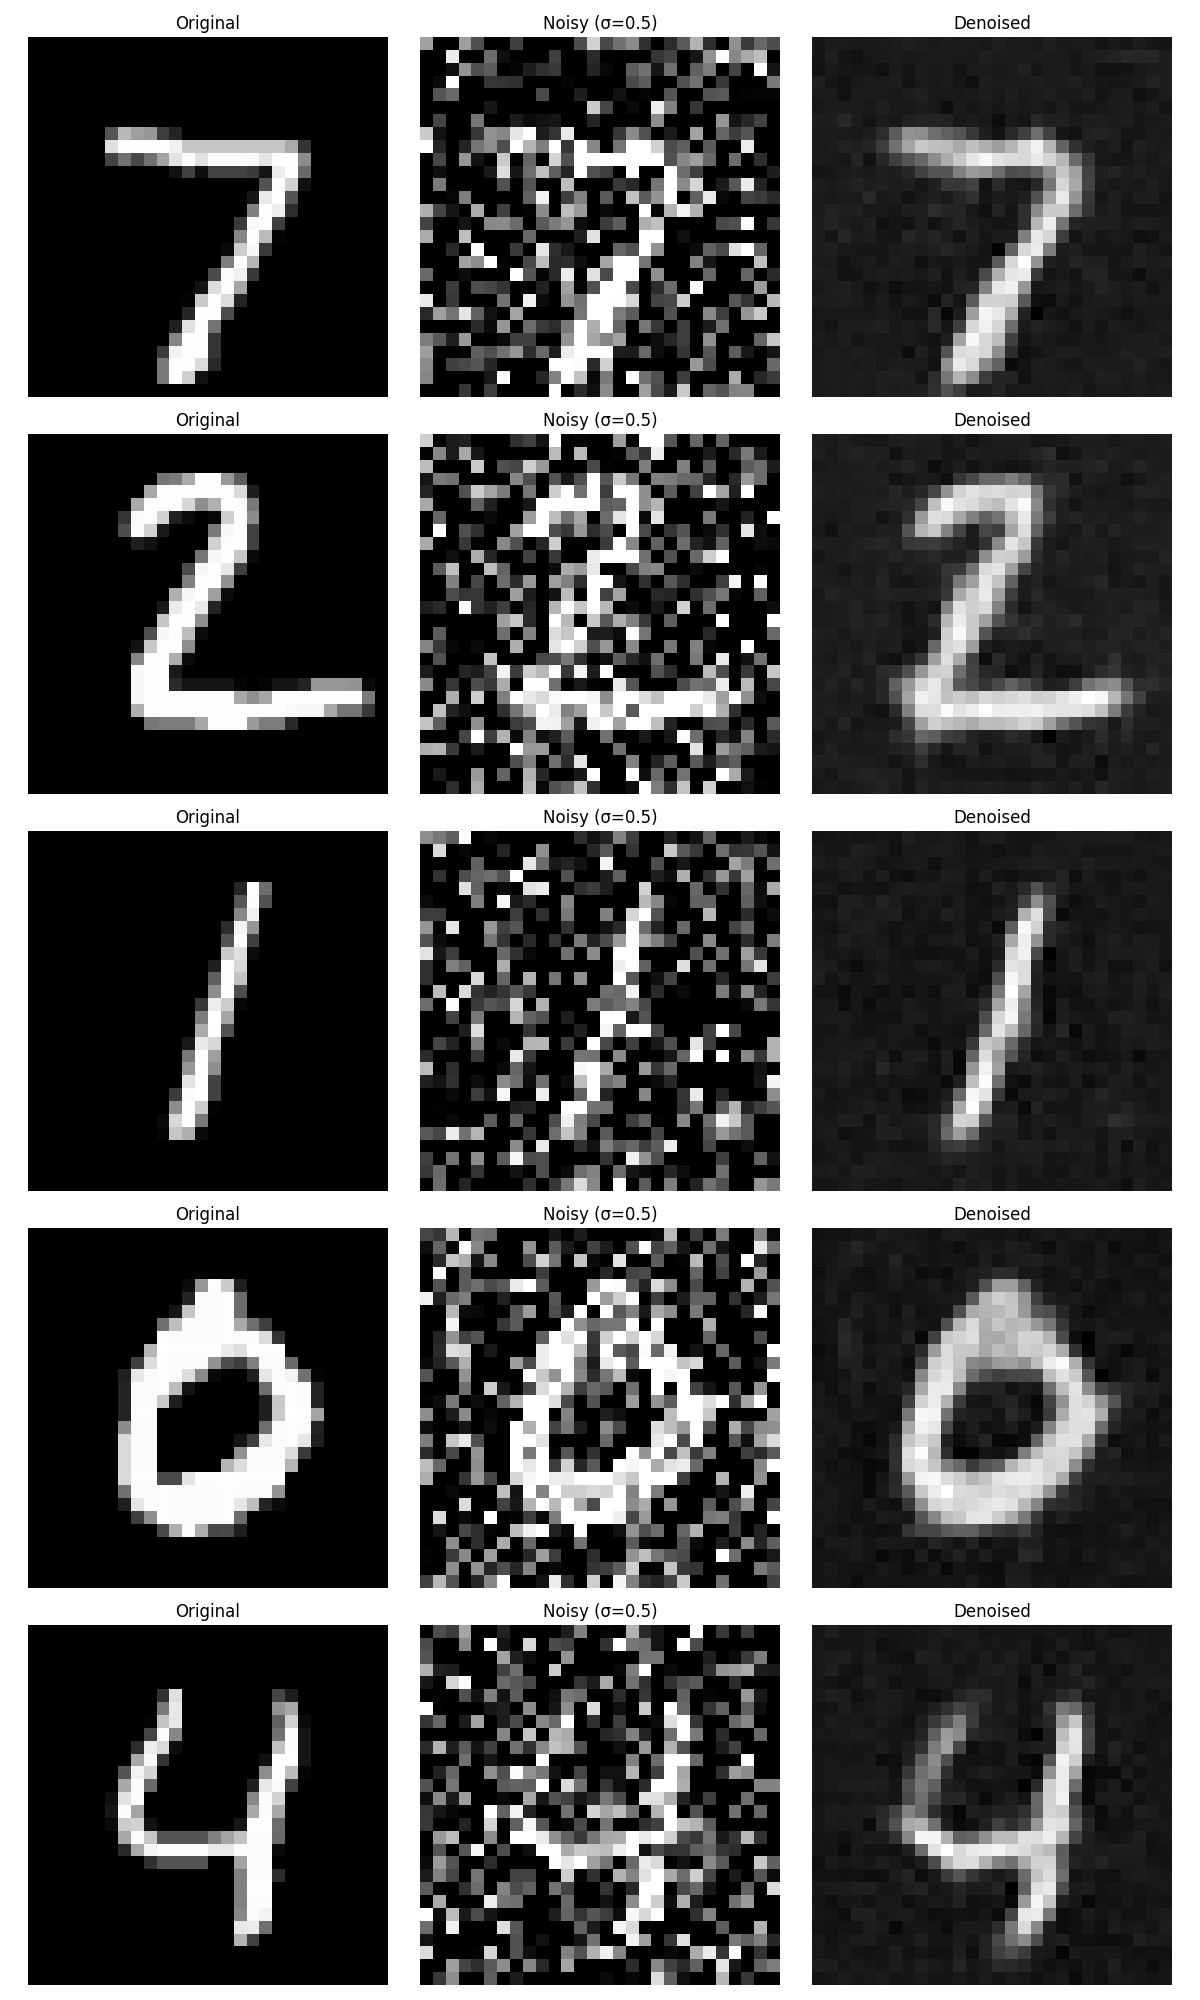
Denoising Results: Epoch 1
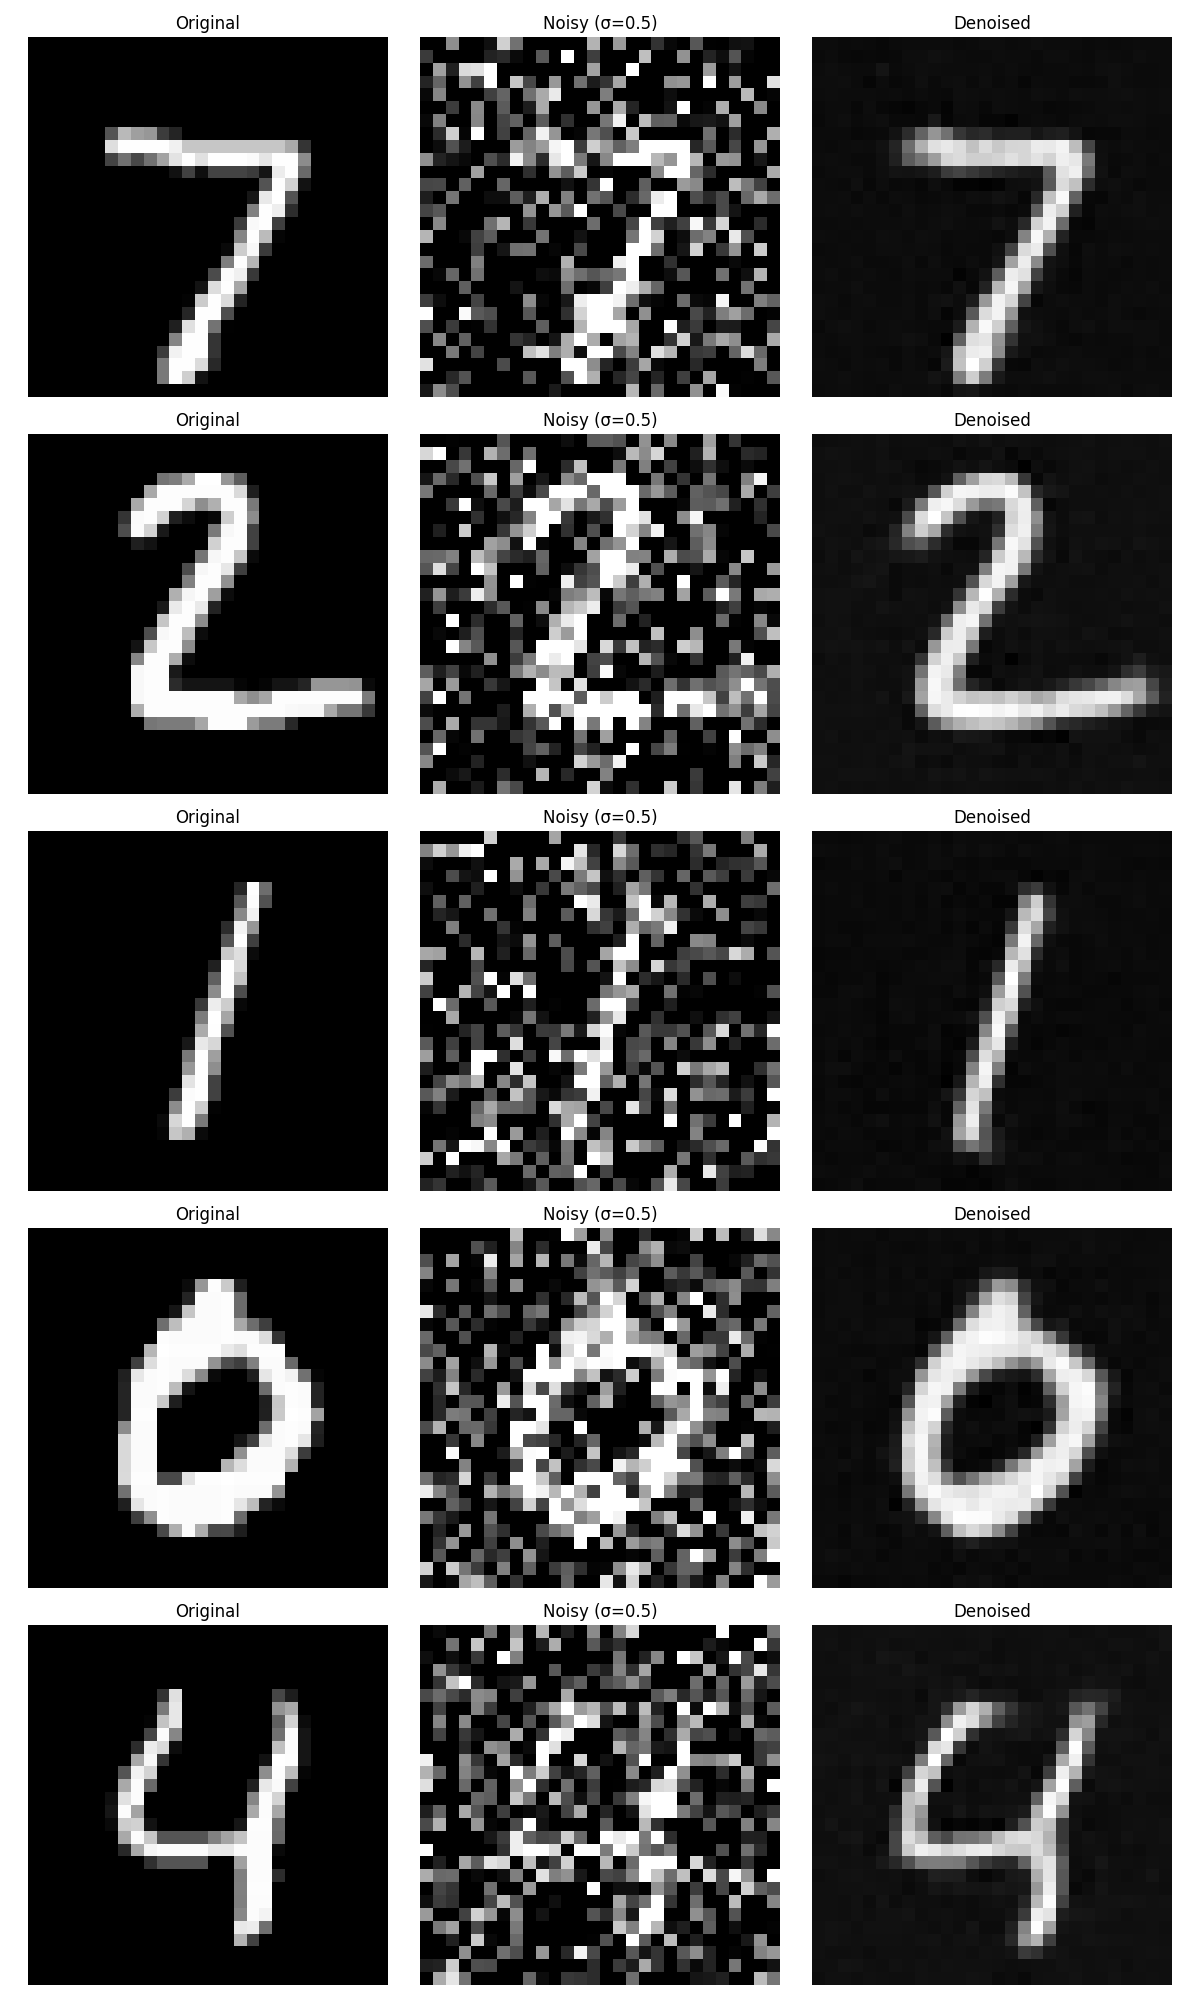
Denoising Results: Epoch 5
We use different sigma values for our test set to see how well our model can generalize. This is various sigma levels for denoising 7:

Part 2: Training a Diffusion Model
Now we will train a UNet that can iteratively denoise an image with DDPM. This is done by solving for the new loss

Time Conditioned UNet
We inject a scalar t into our unconditional UNet model to condition it to time inputs. We used the following equation to train:
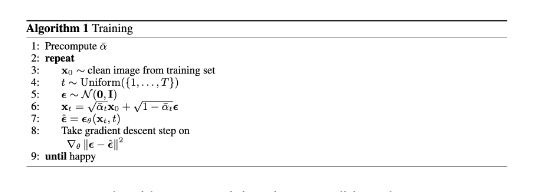
Which resulted in the following loss curve:
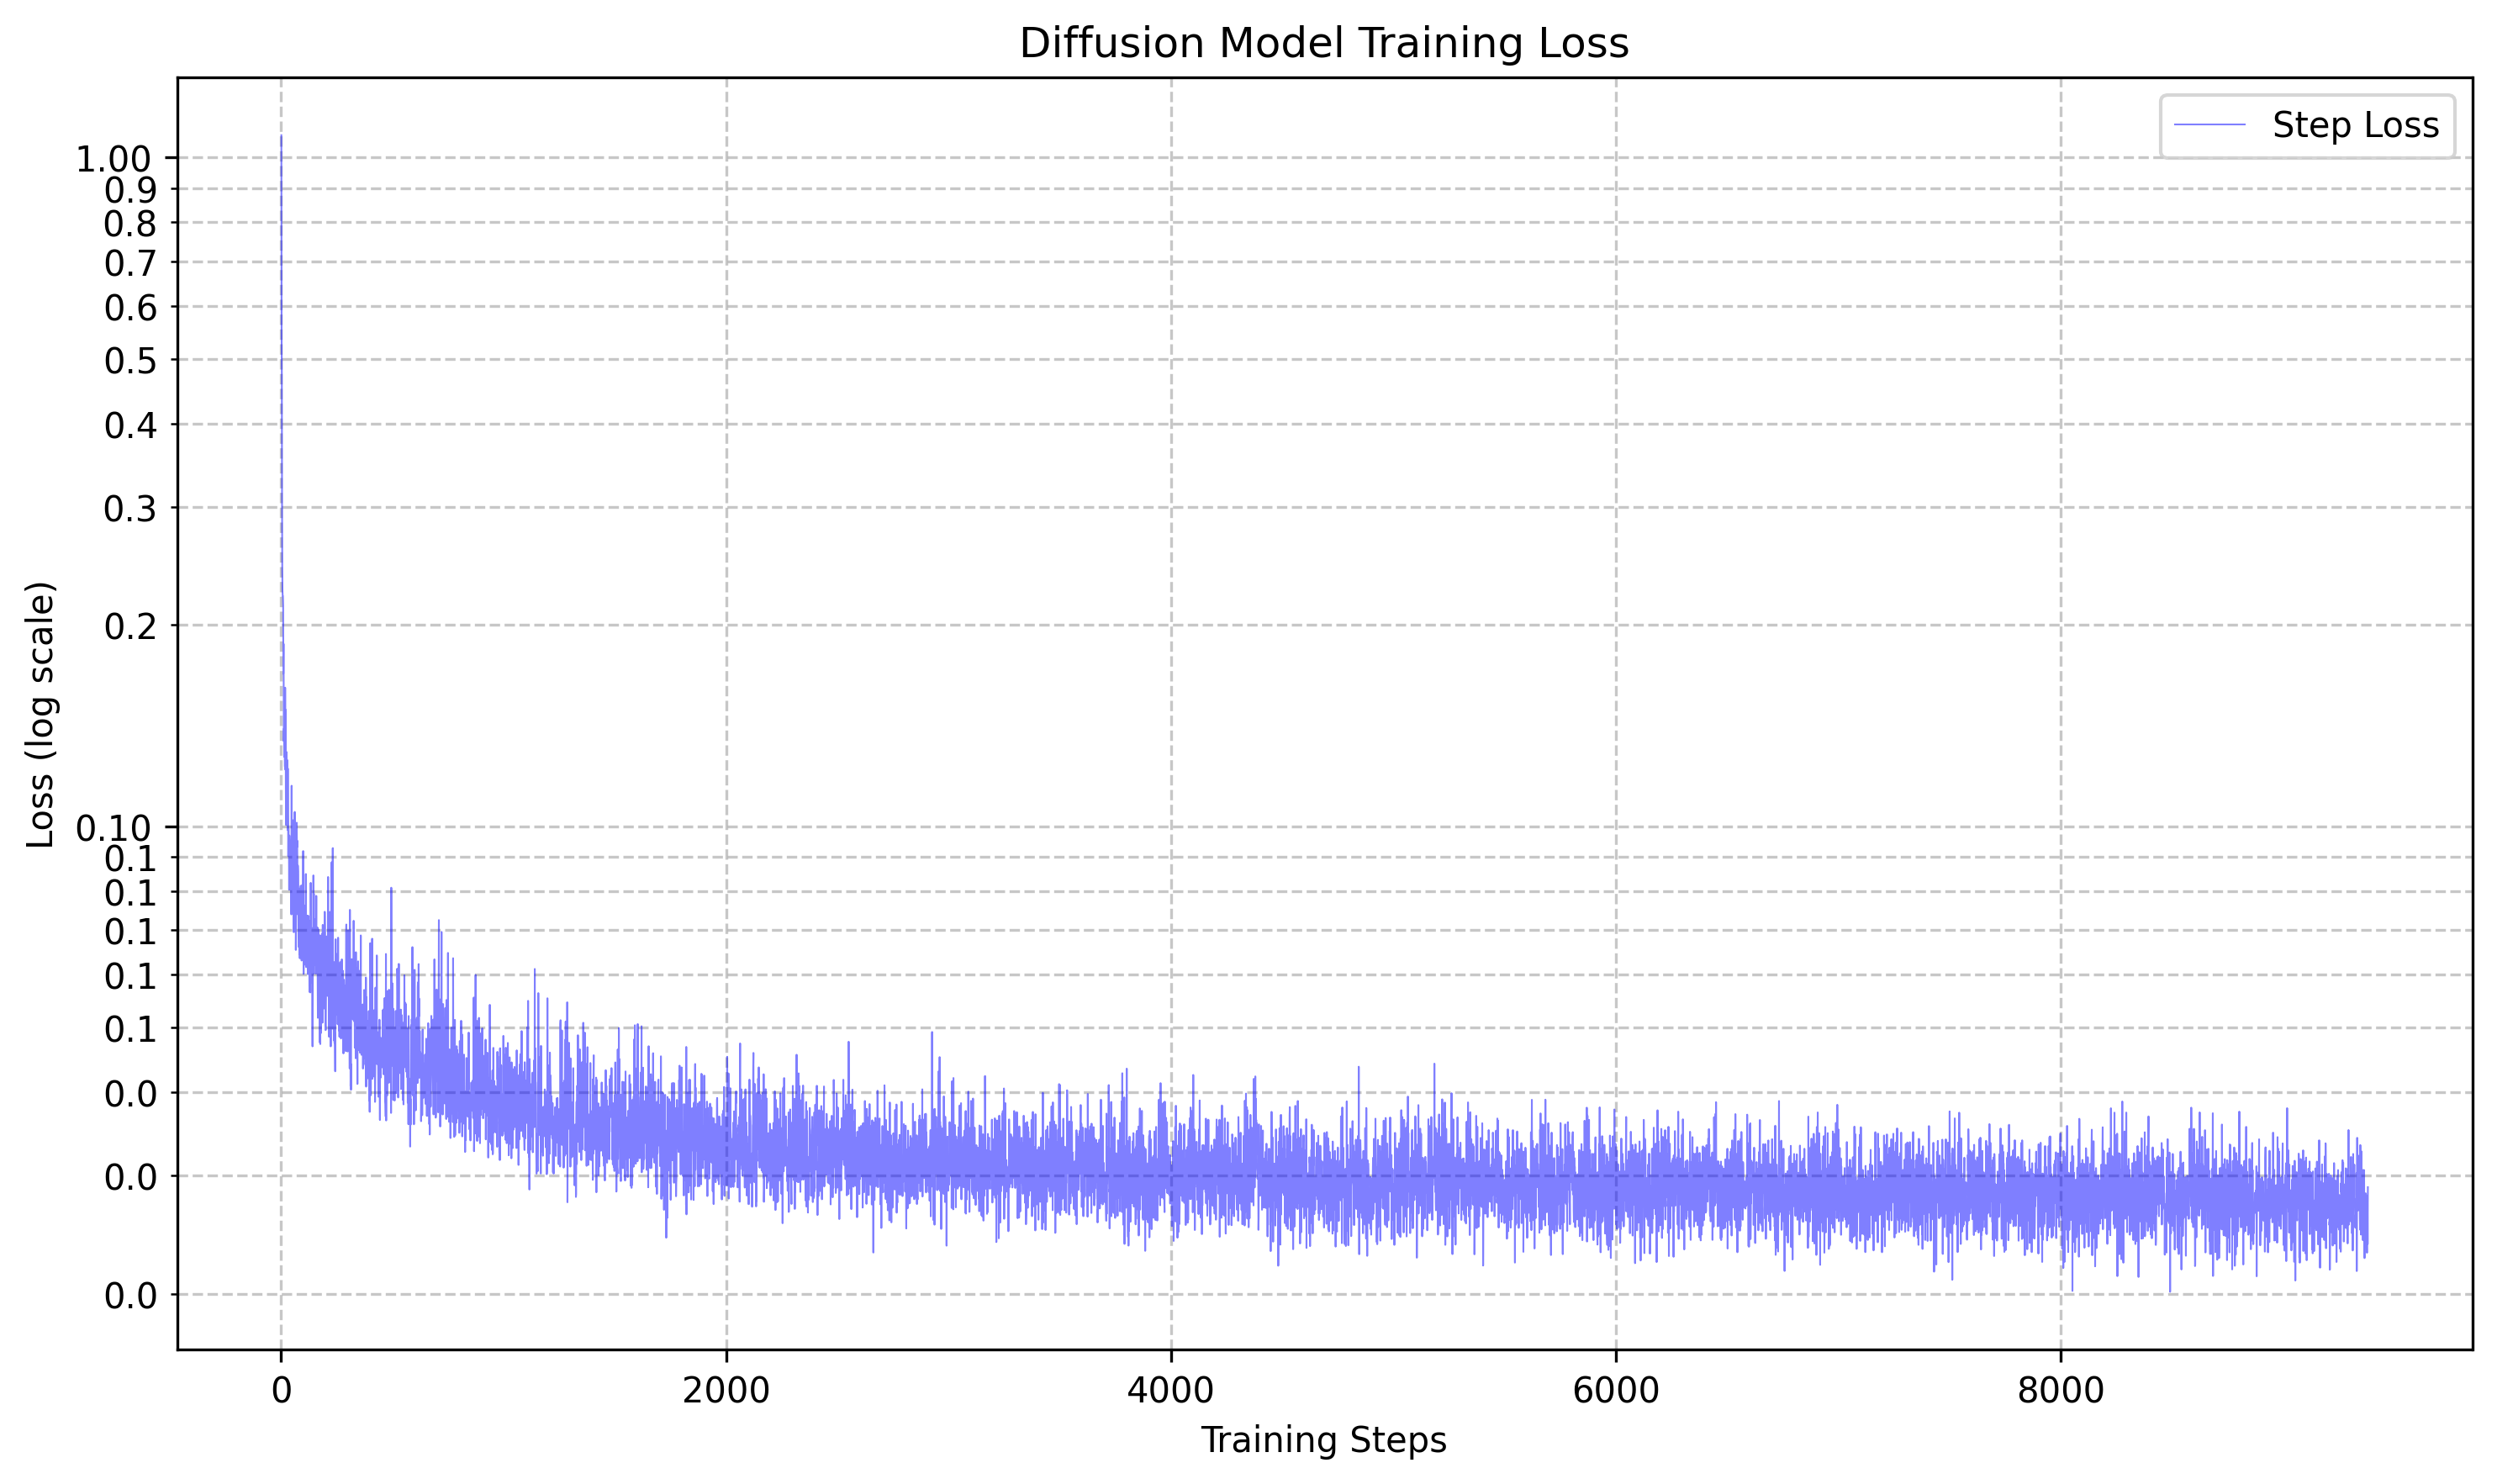
Then we tried sampling the UNet at various epochs using thie following algorithm:

Which led to the following results for various epochs. As one can see, it does an OK job at generating new samples but it still doesn't look exactly like numerical digits.

Denoising Results: Epoch 1

Denoising Results: Epoch 5
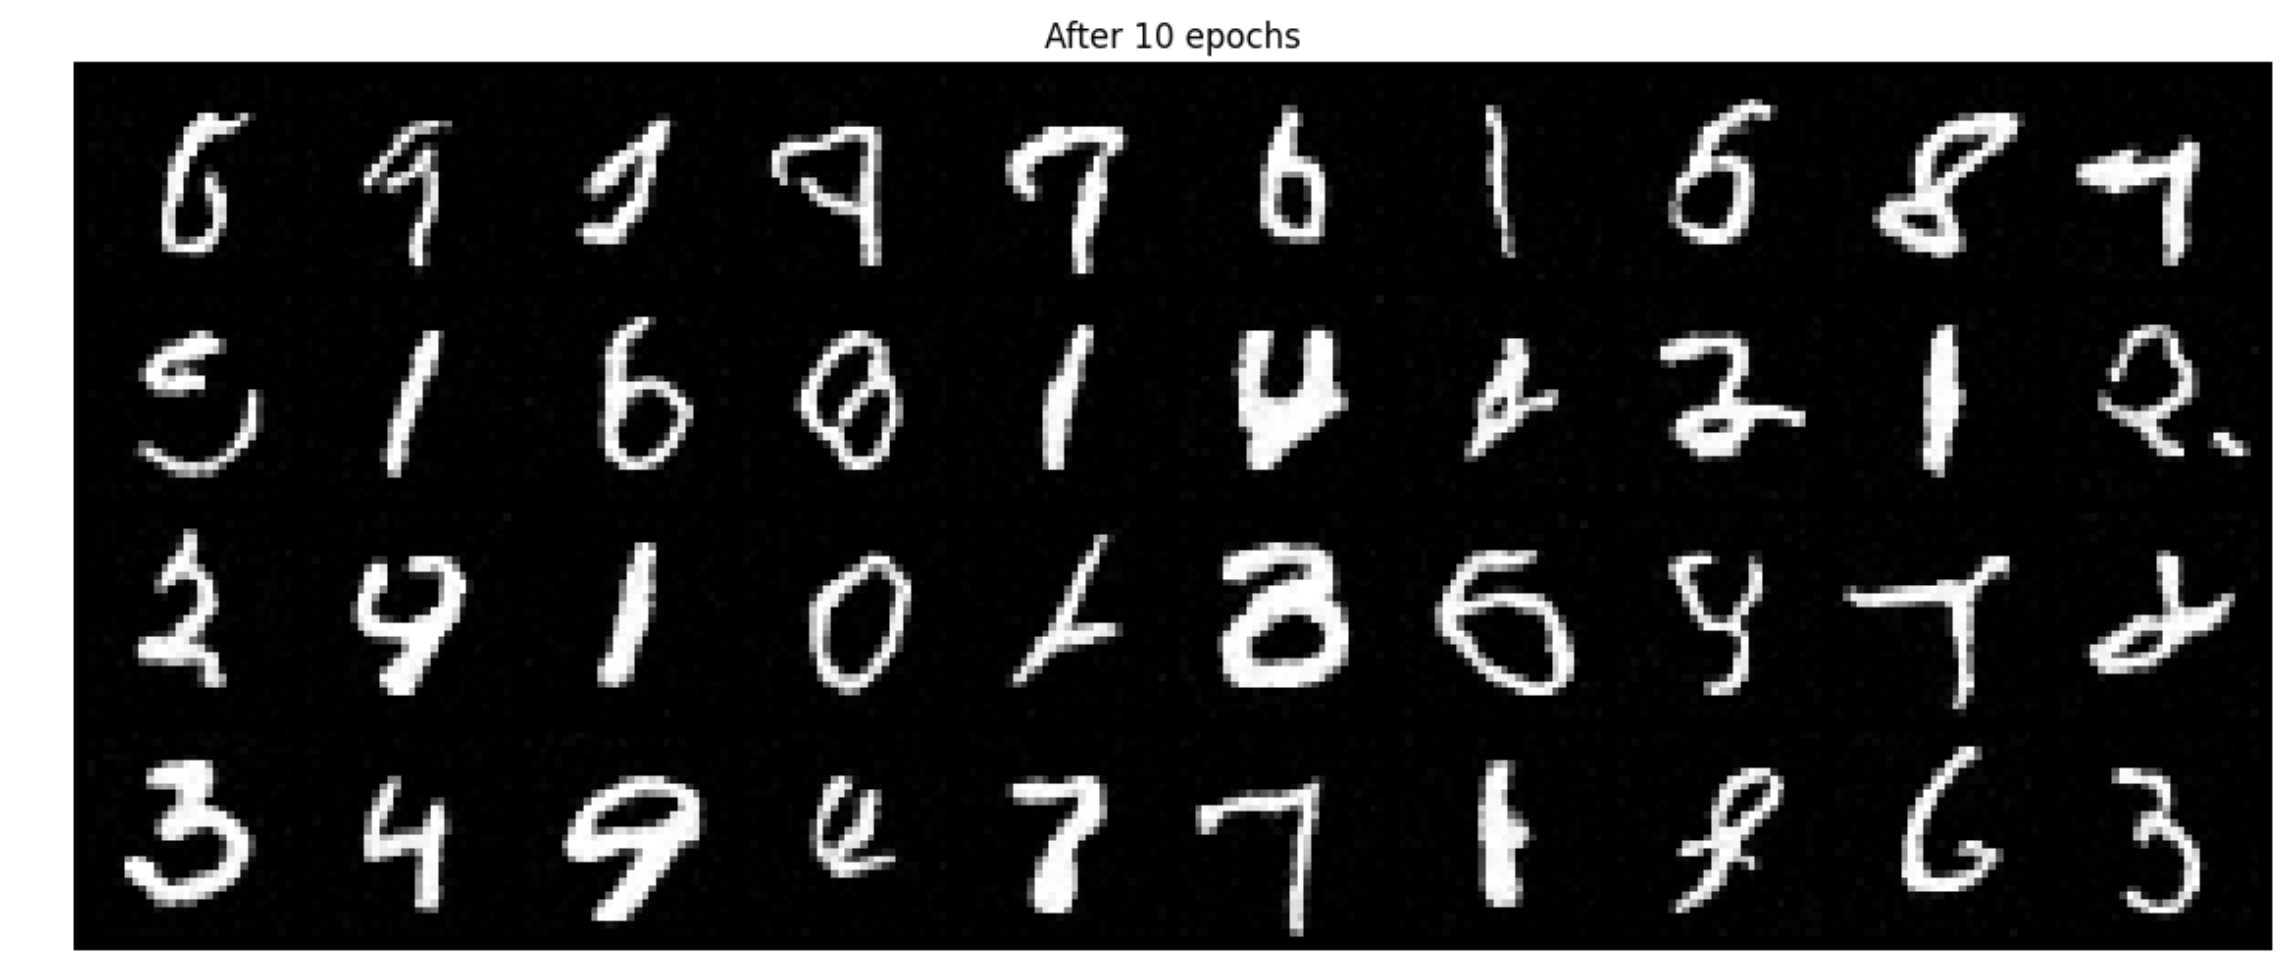
Denoising Results: Epoch 10
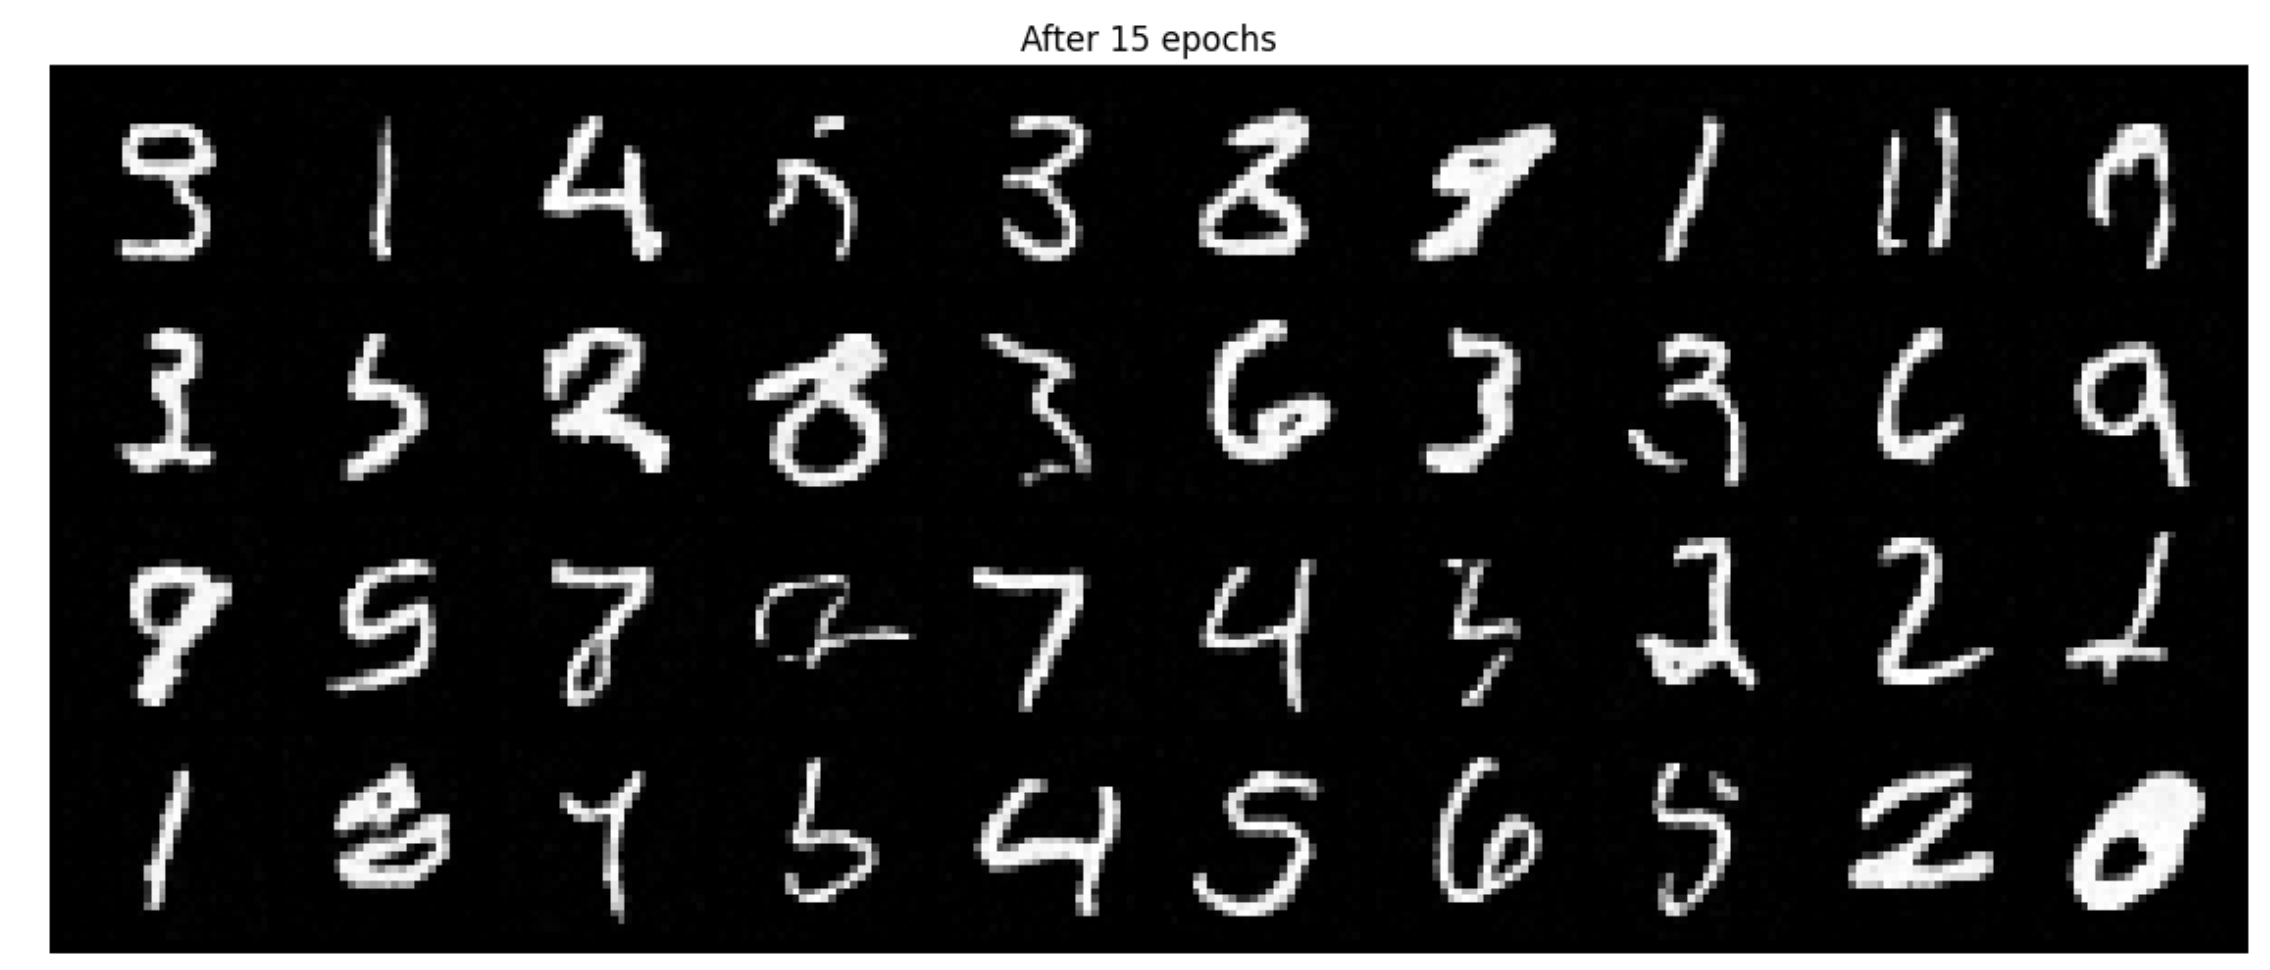
Denoising Results: Epoch 15

Denoising Results: Epoch 20
Class Conditioned UNet
To give more control over what we generate, we can add conditioning on the class of each digit. To allow the model to generalize to without class condition, we also implement a dropout rate of 0.1. This is the algorithm we
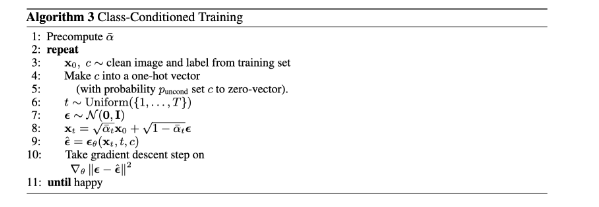
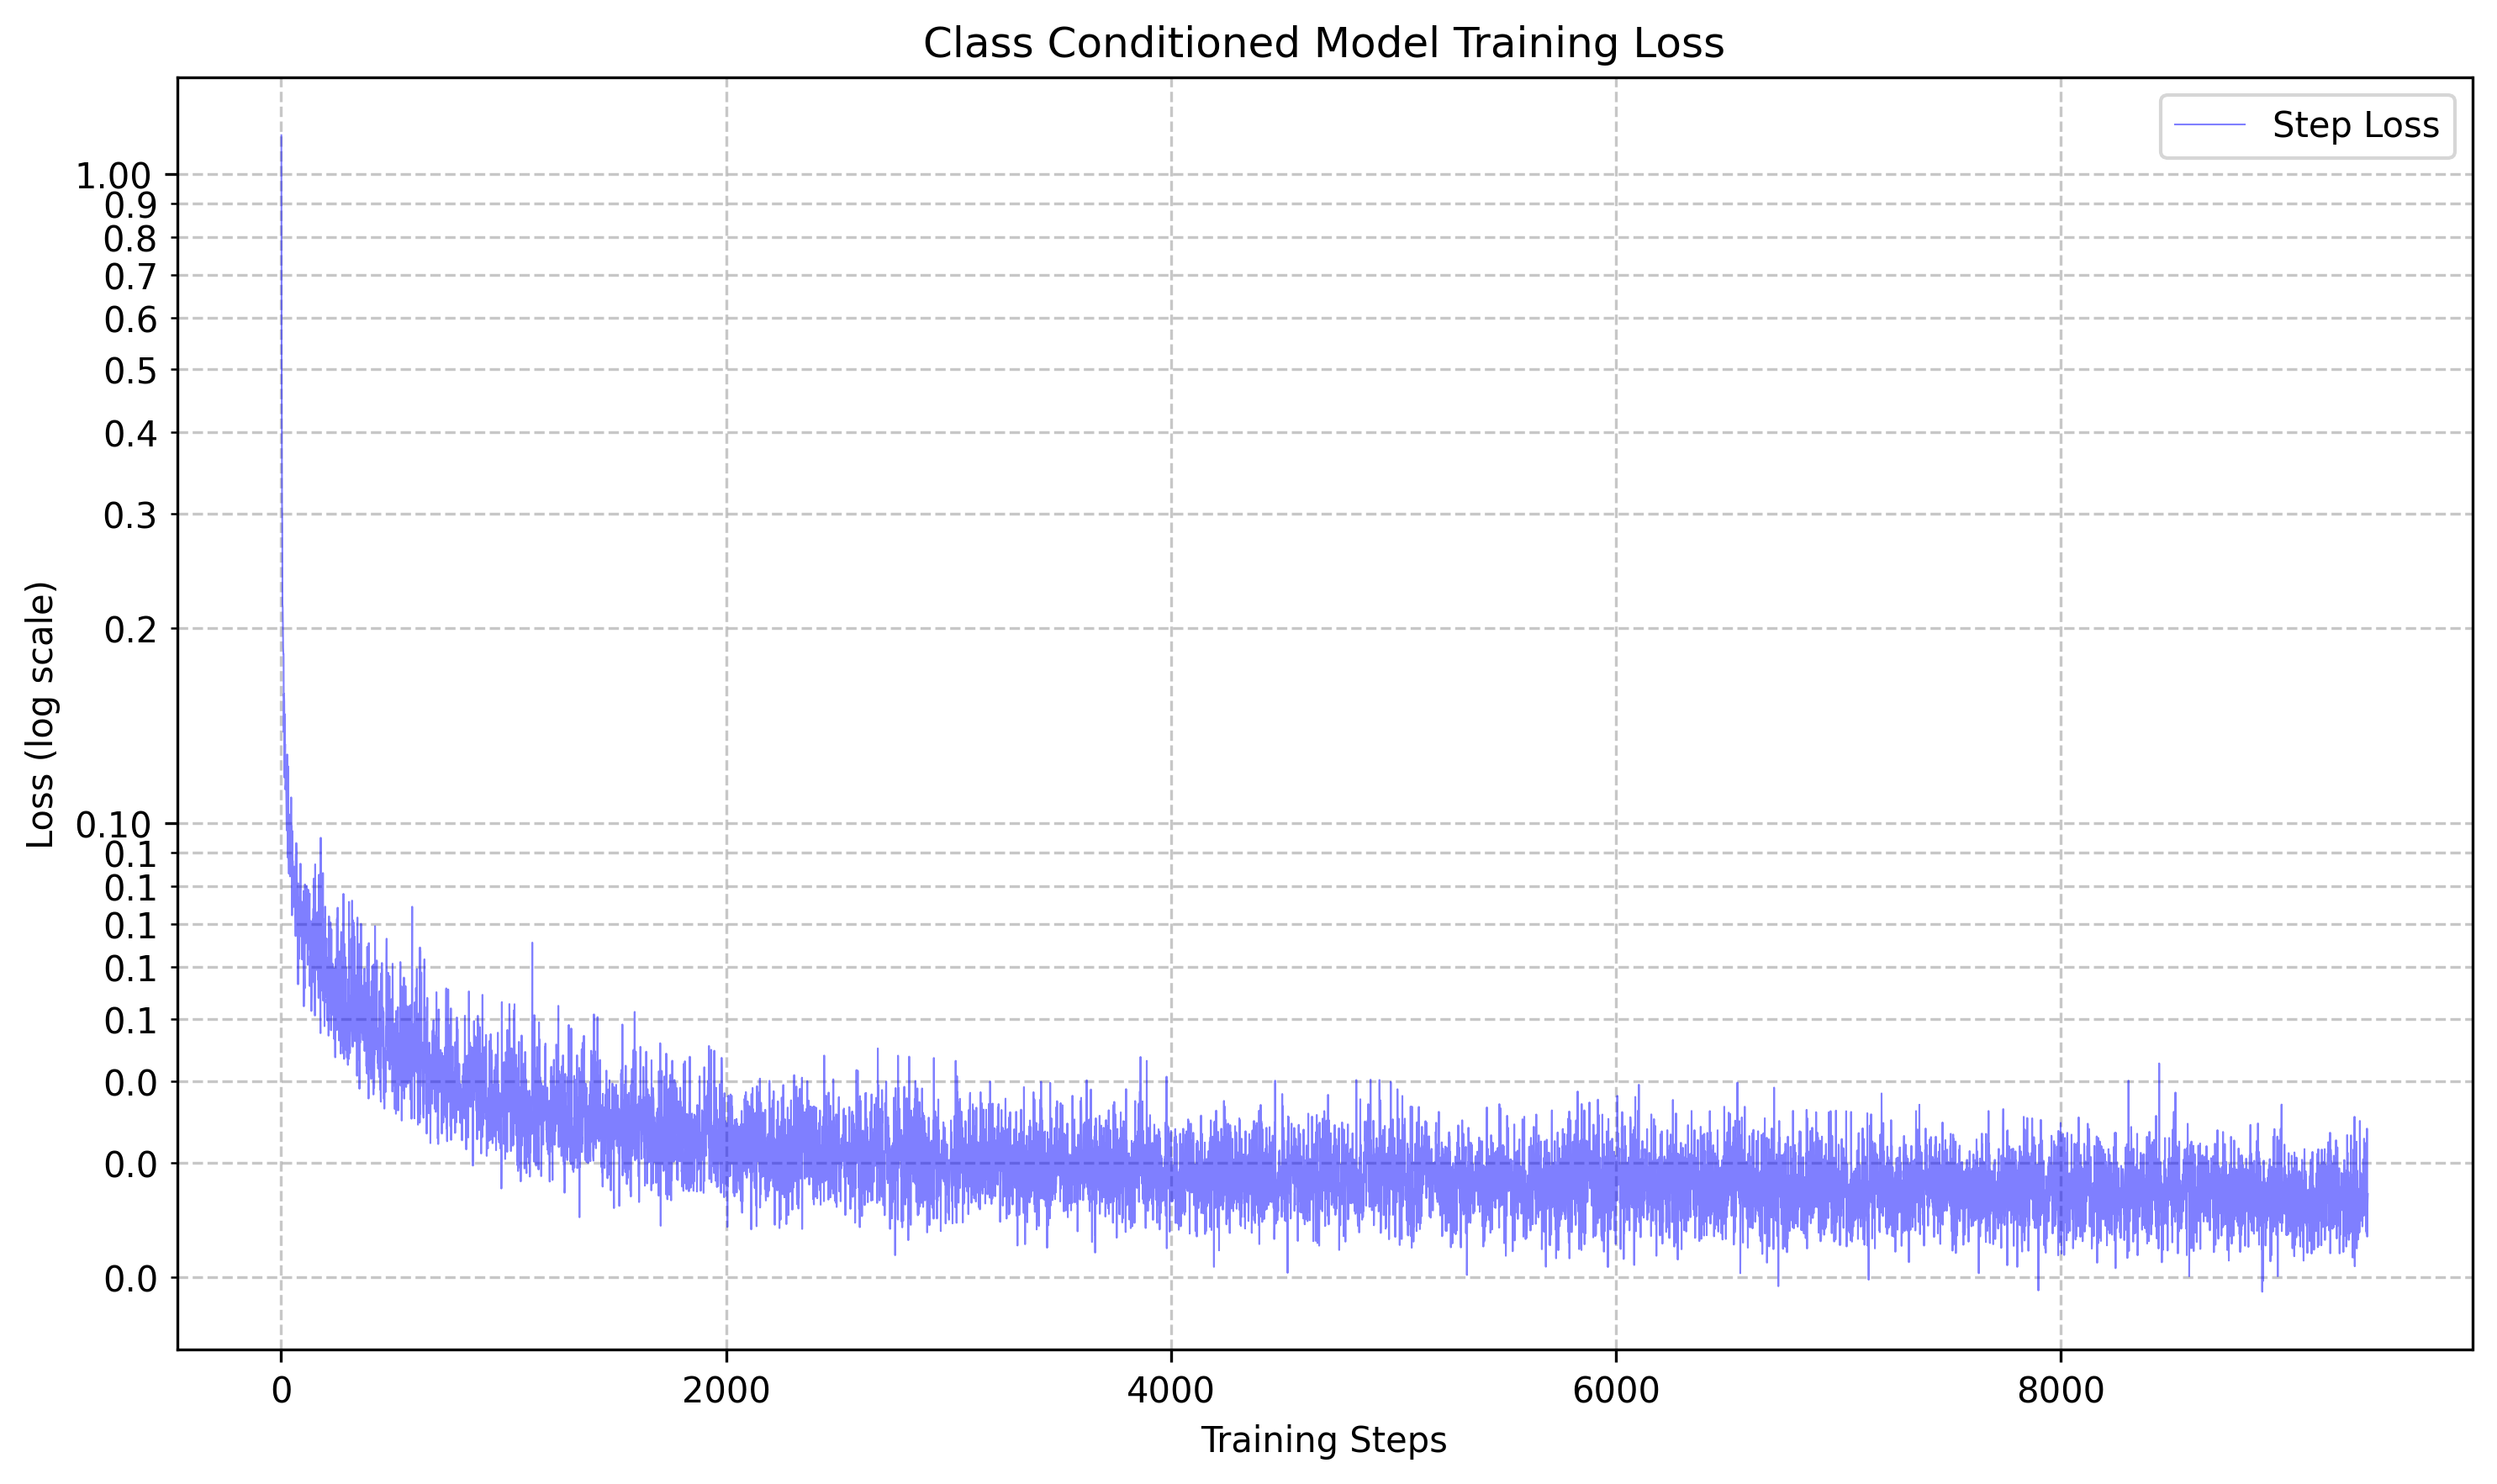
This led to the training loss graph of the following:
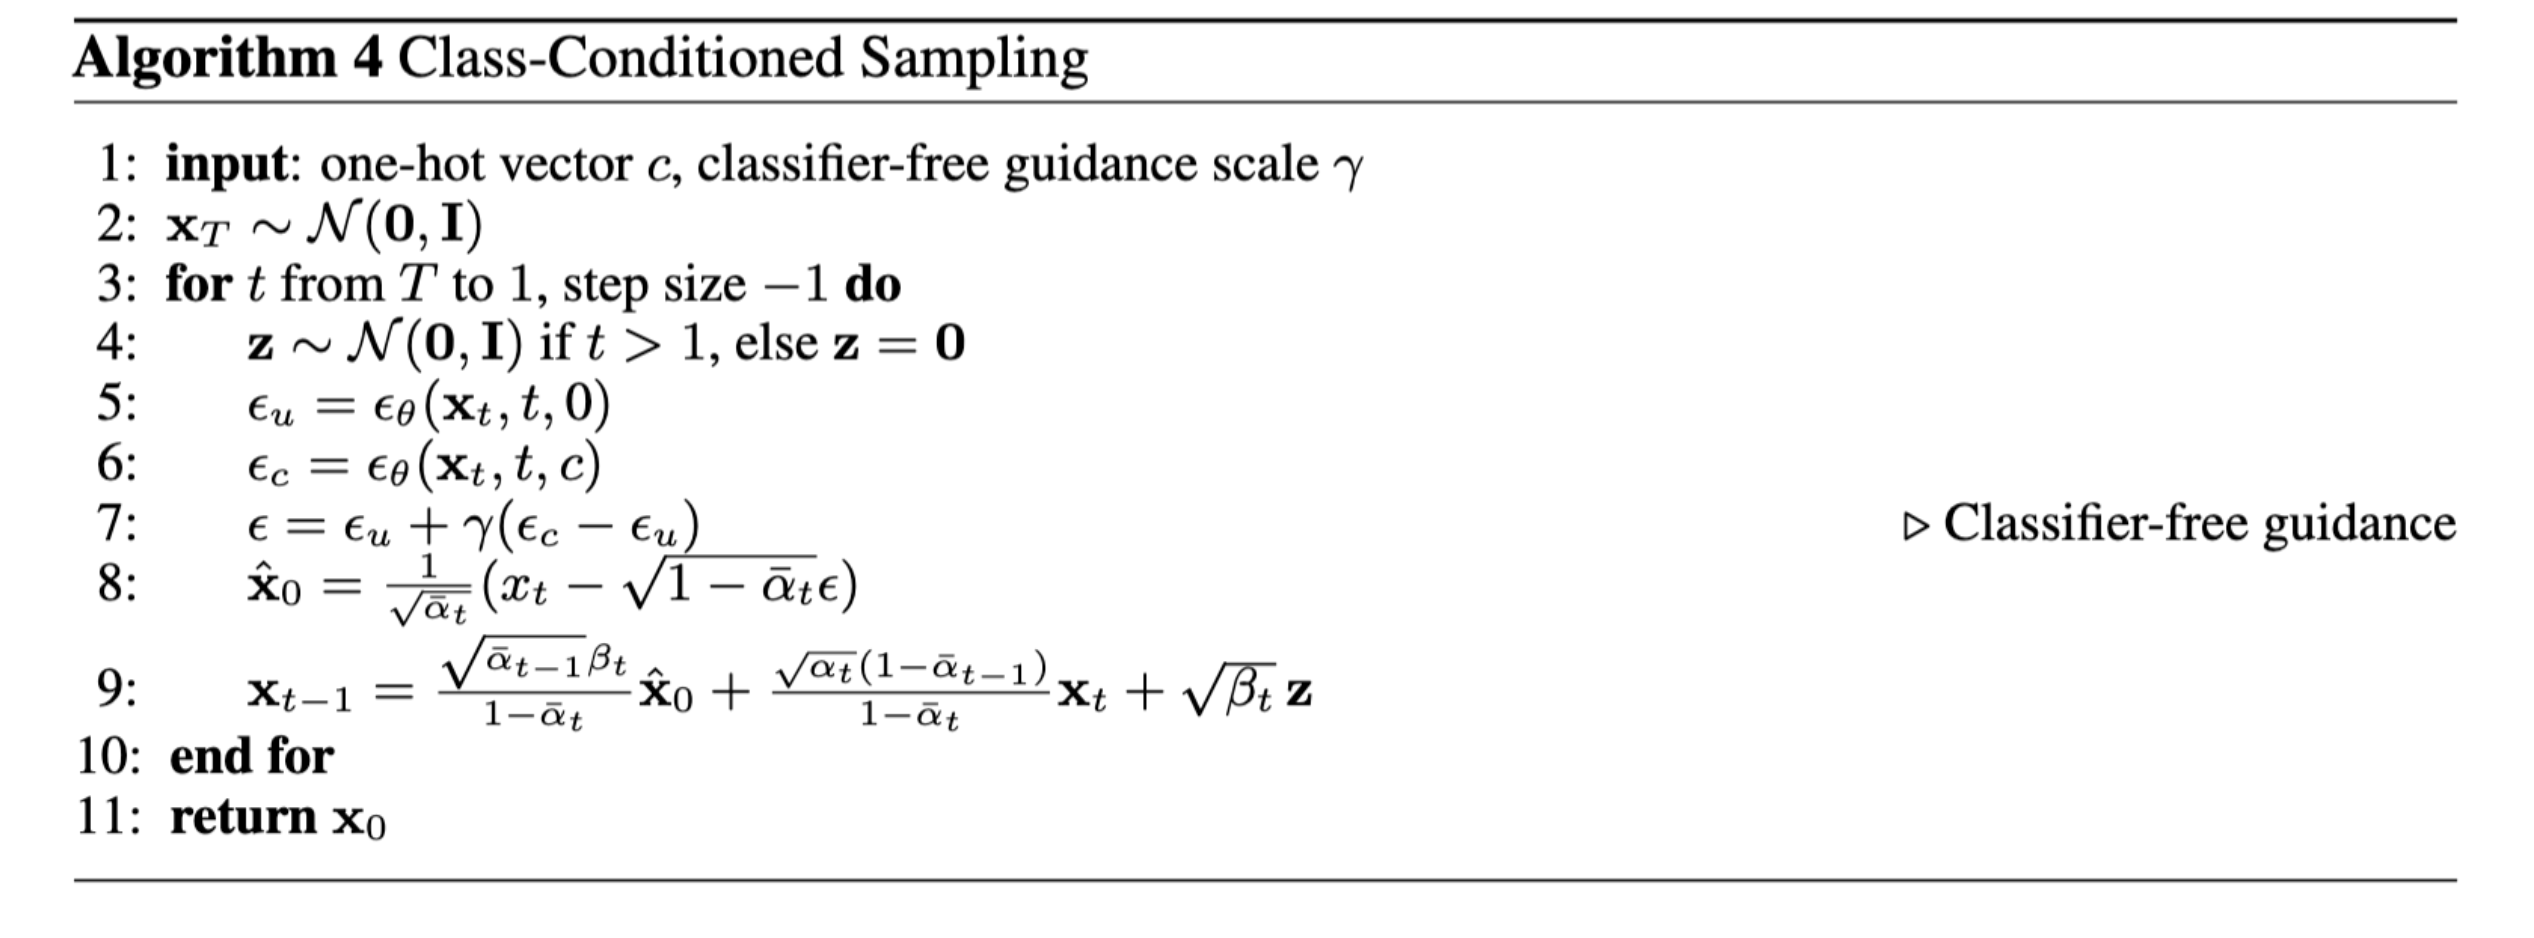
Then we tried sampling the UNet at various epochs using the following algorithm:
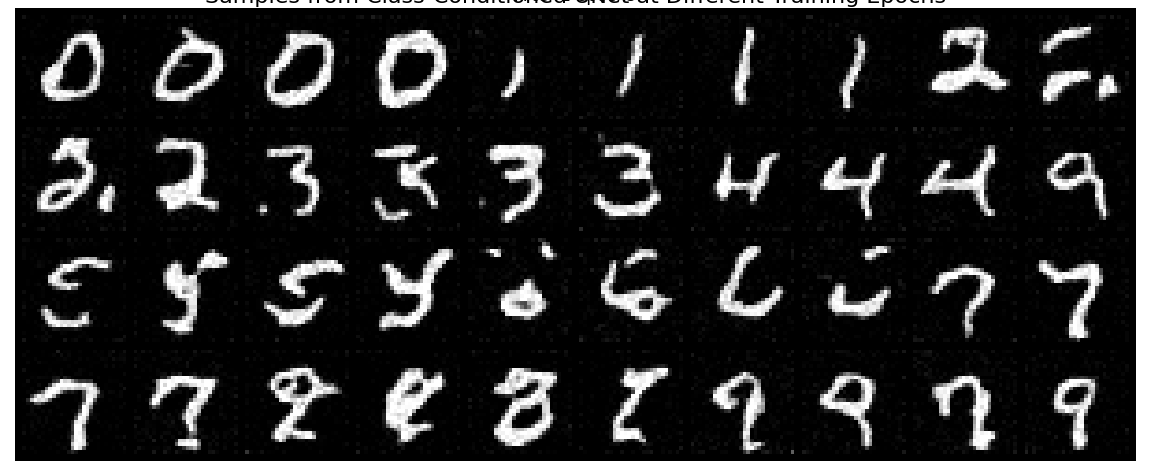
Denoising Results: Epoch 1
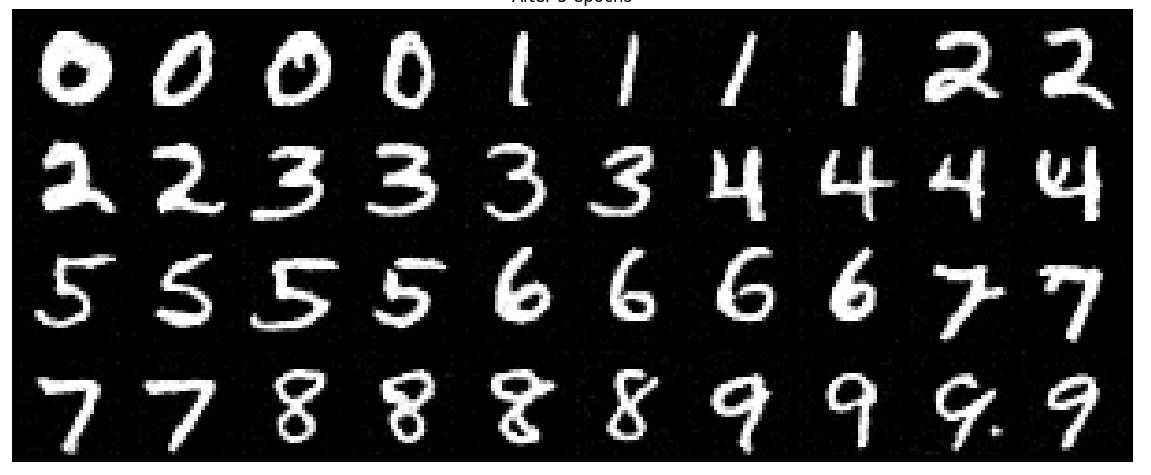
Denoising Results: Epoch 5
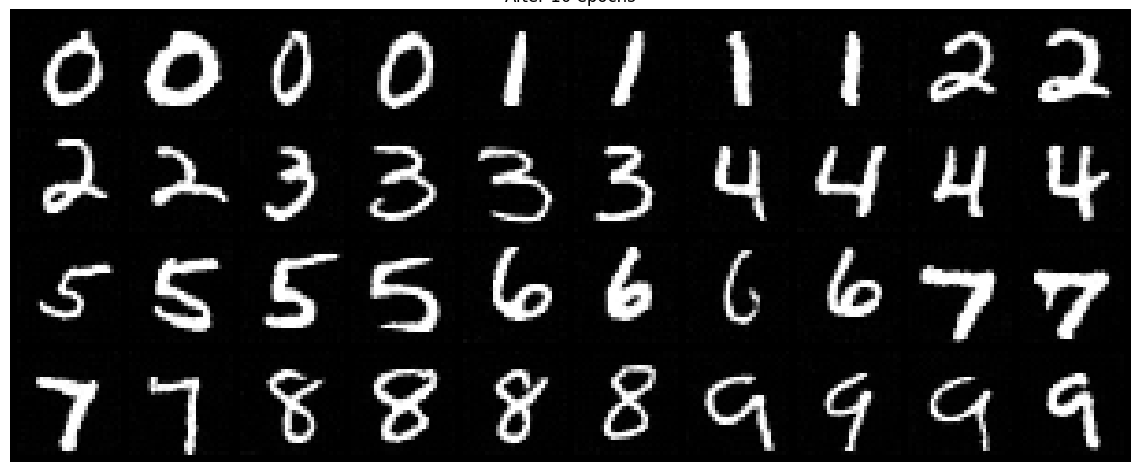
Denoising Results: Epoch 10
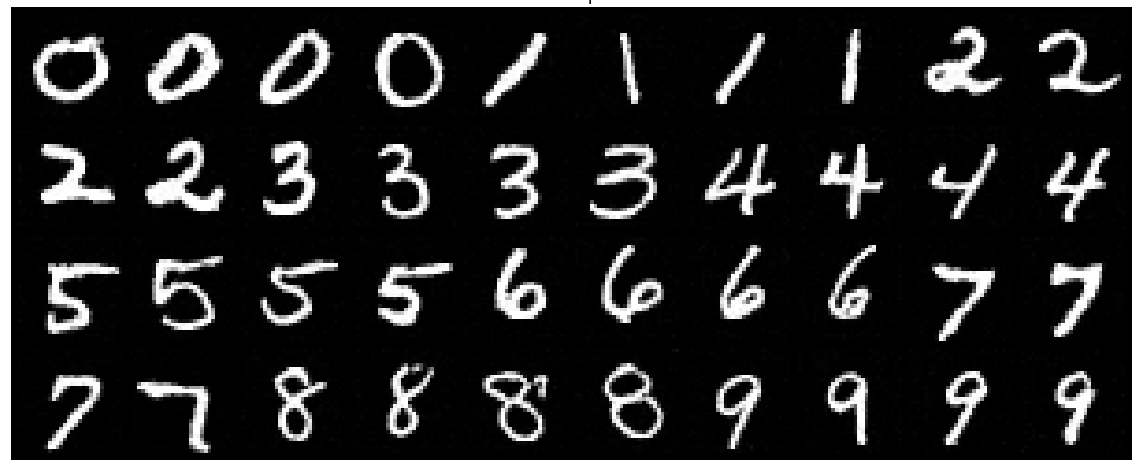
Denoising Results: Epoch 15
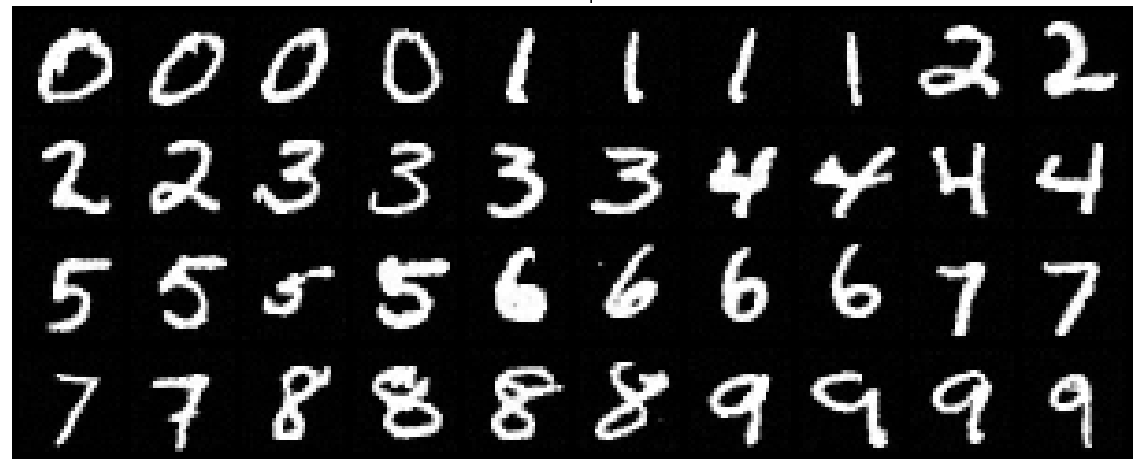
Denoising Results: Epoch 20
Bells and Whistles 🔔
I created sampling gifs for sampline of time conditioned unets at epoch 1 to 20.

Epoch 1

Epoch 10

Epoch 15

Epoch 20
I also created tried to create a course logo :P Maybe it can be used in the future...
